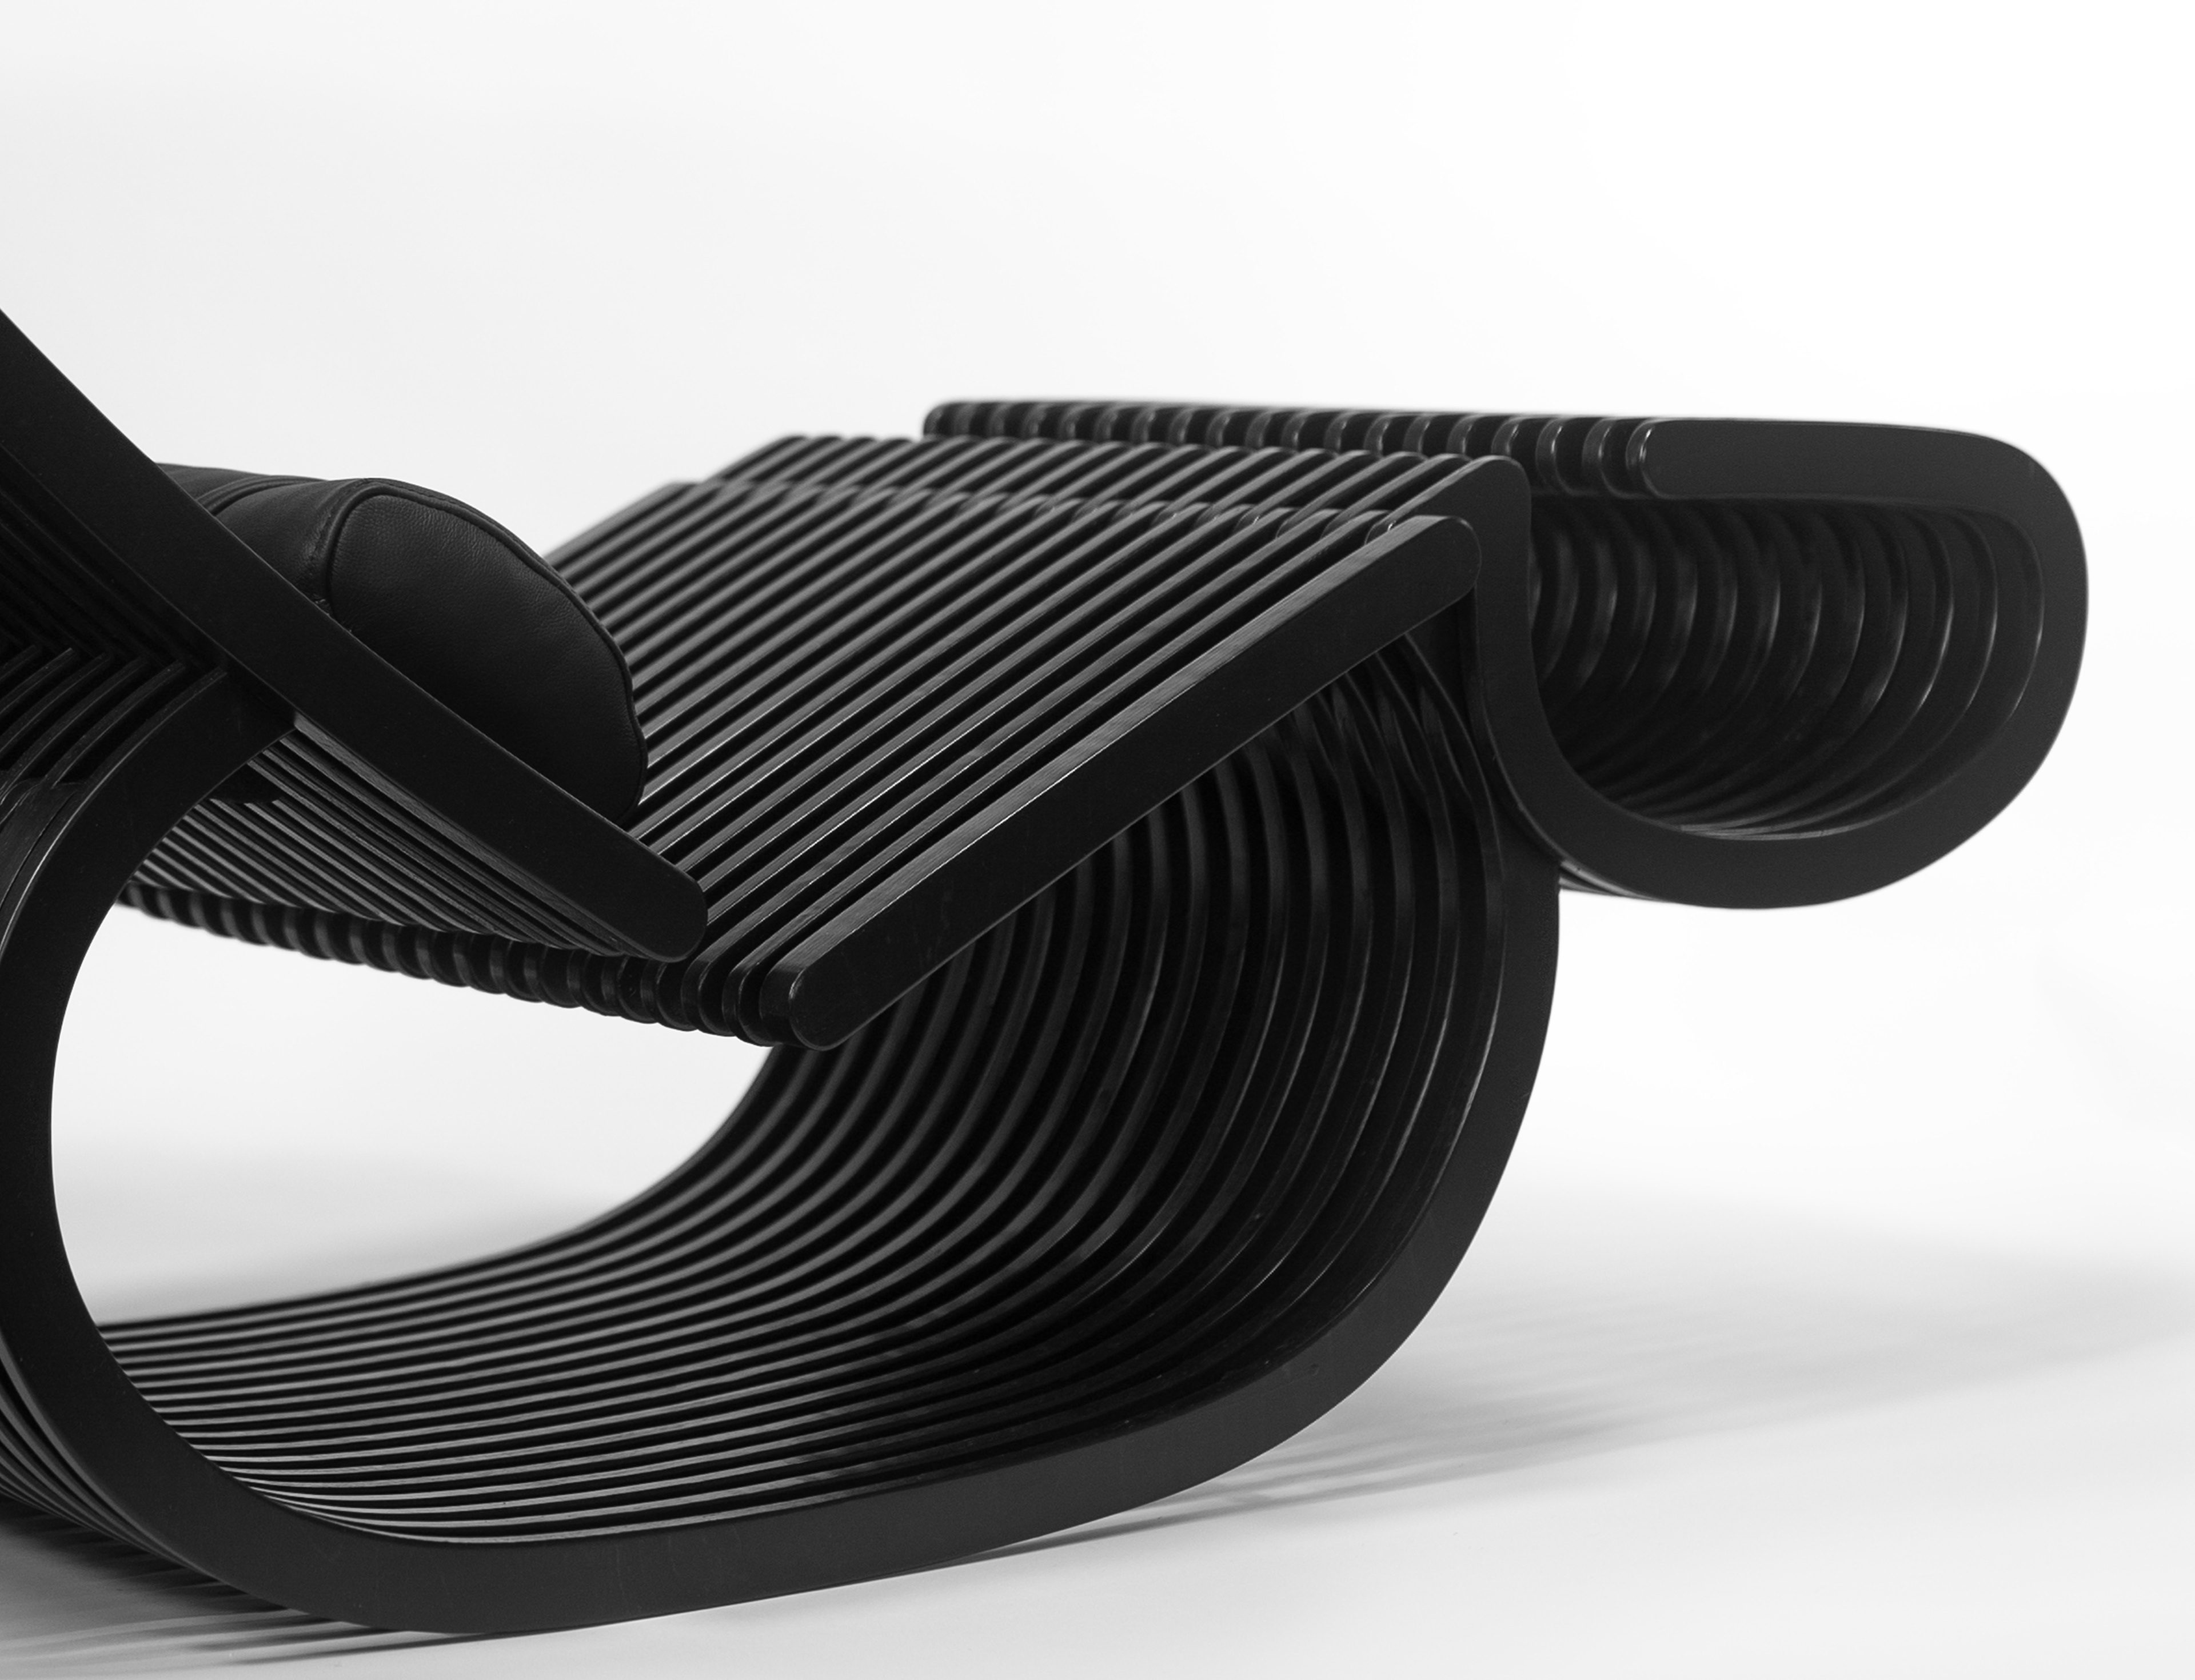
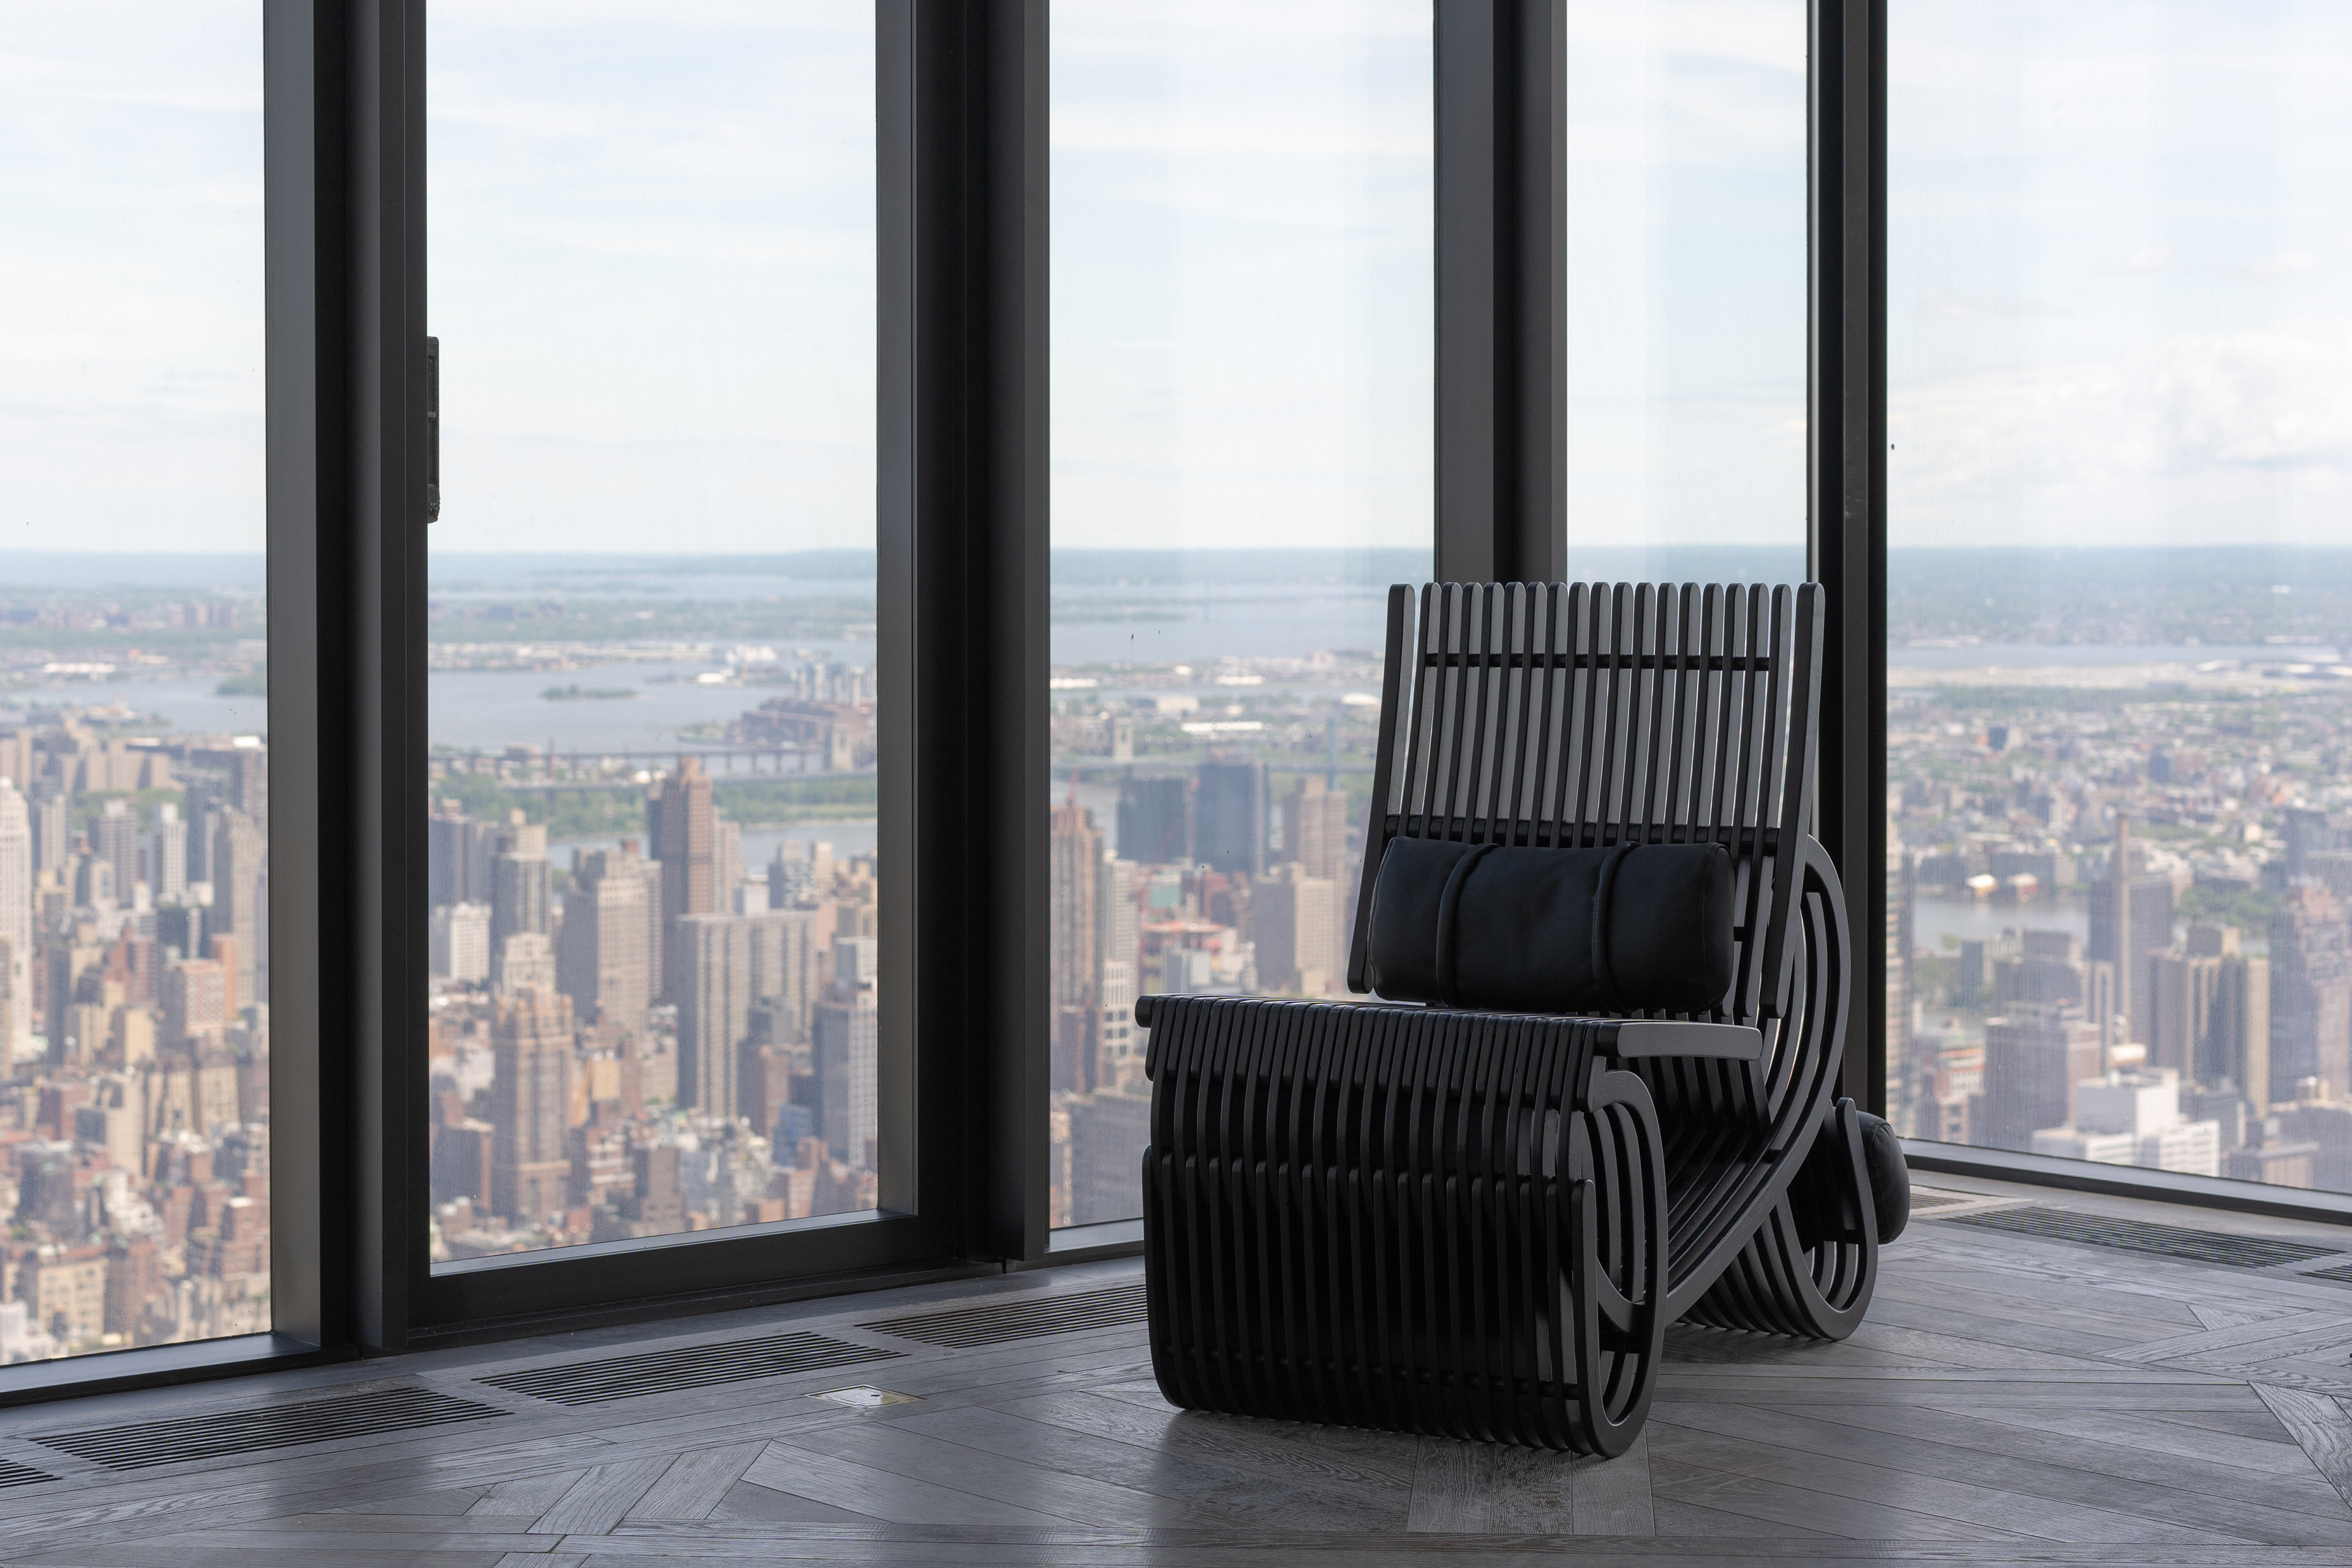
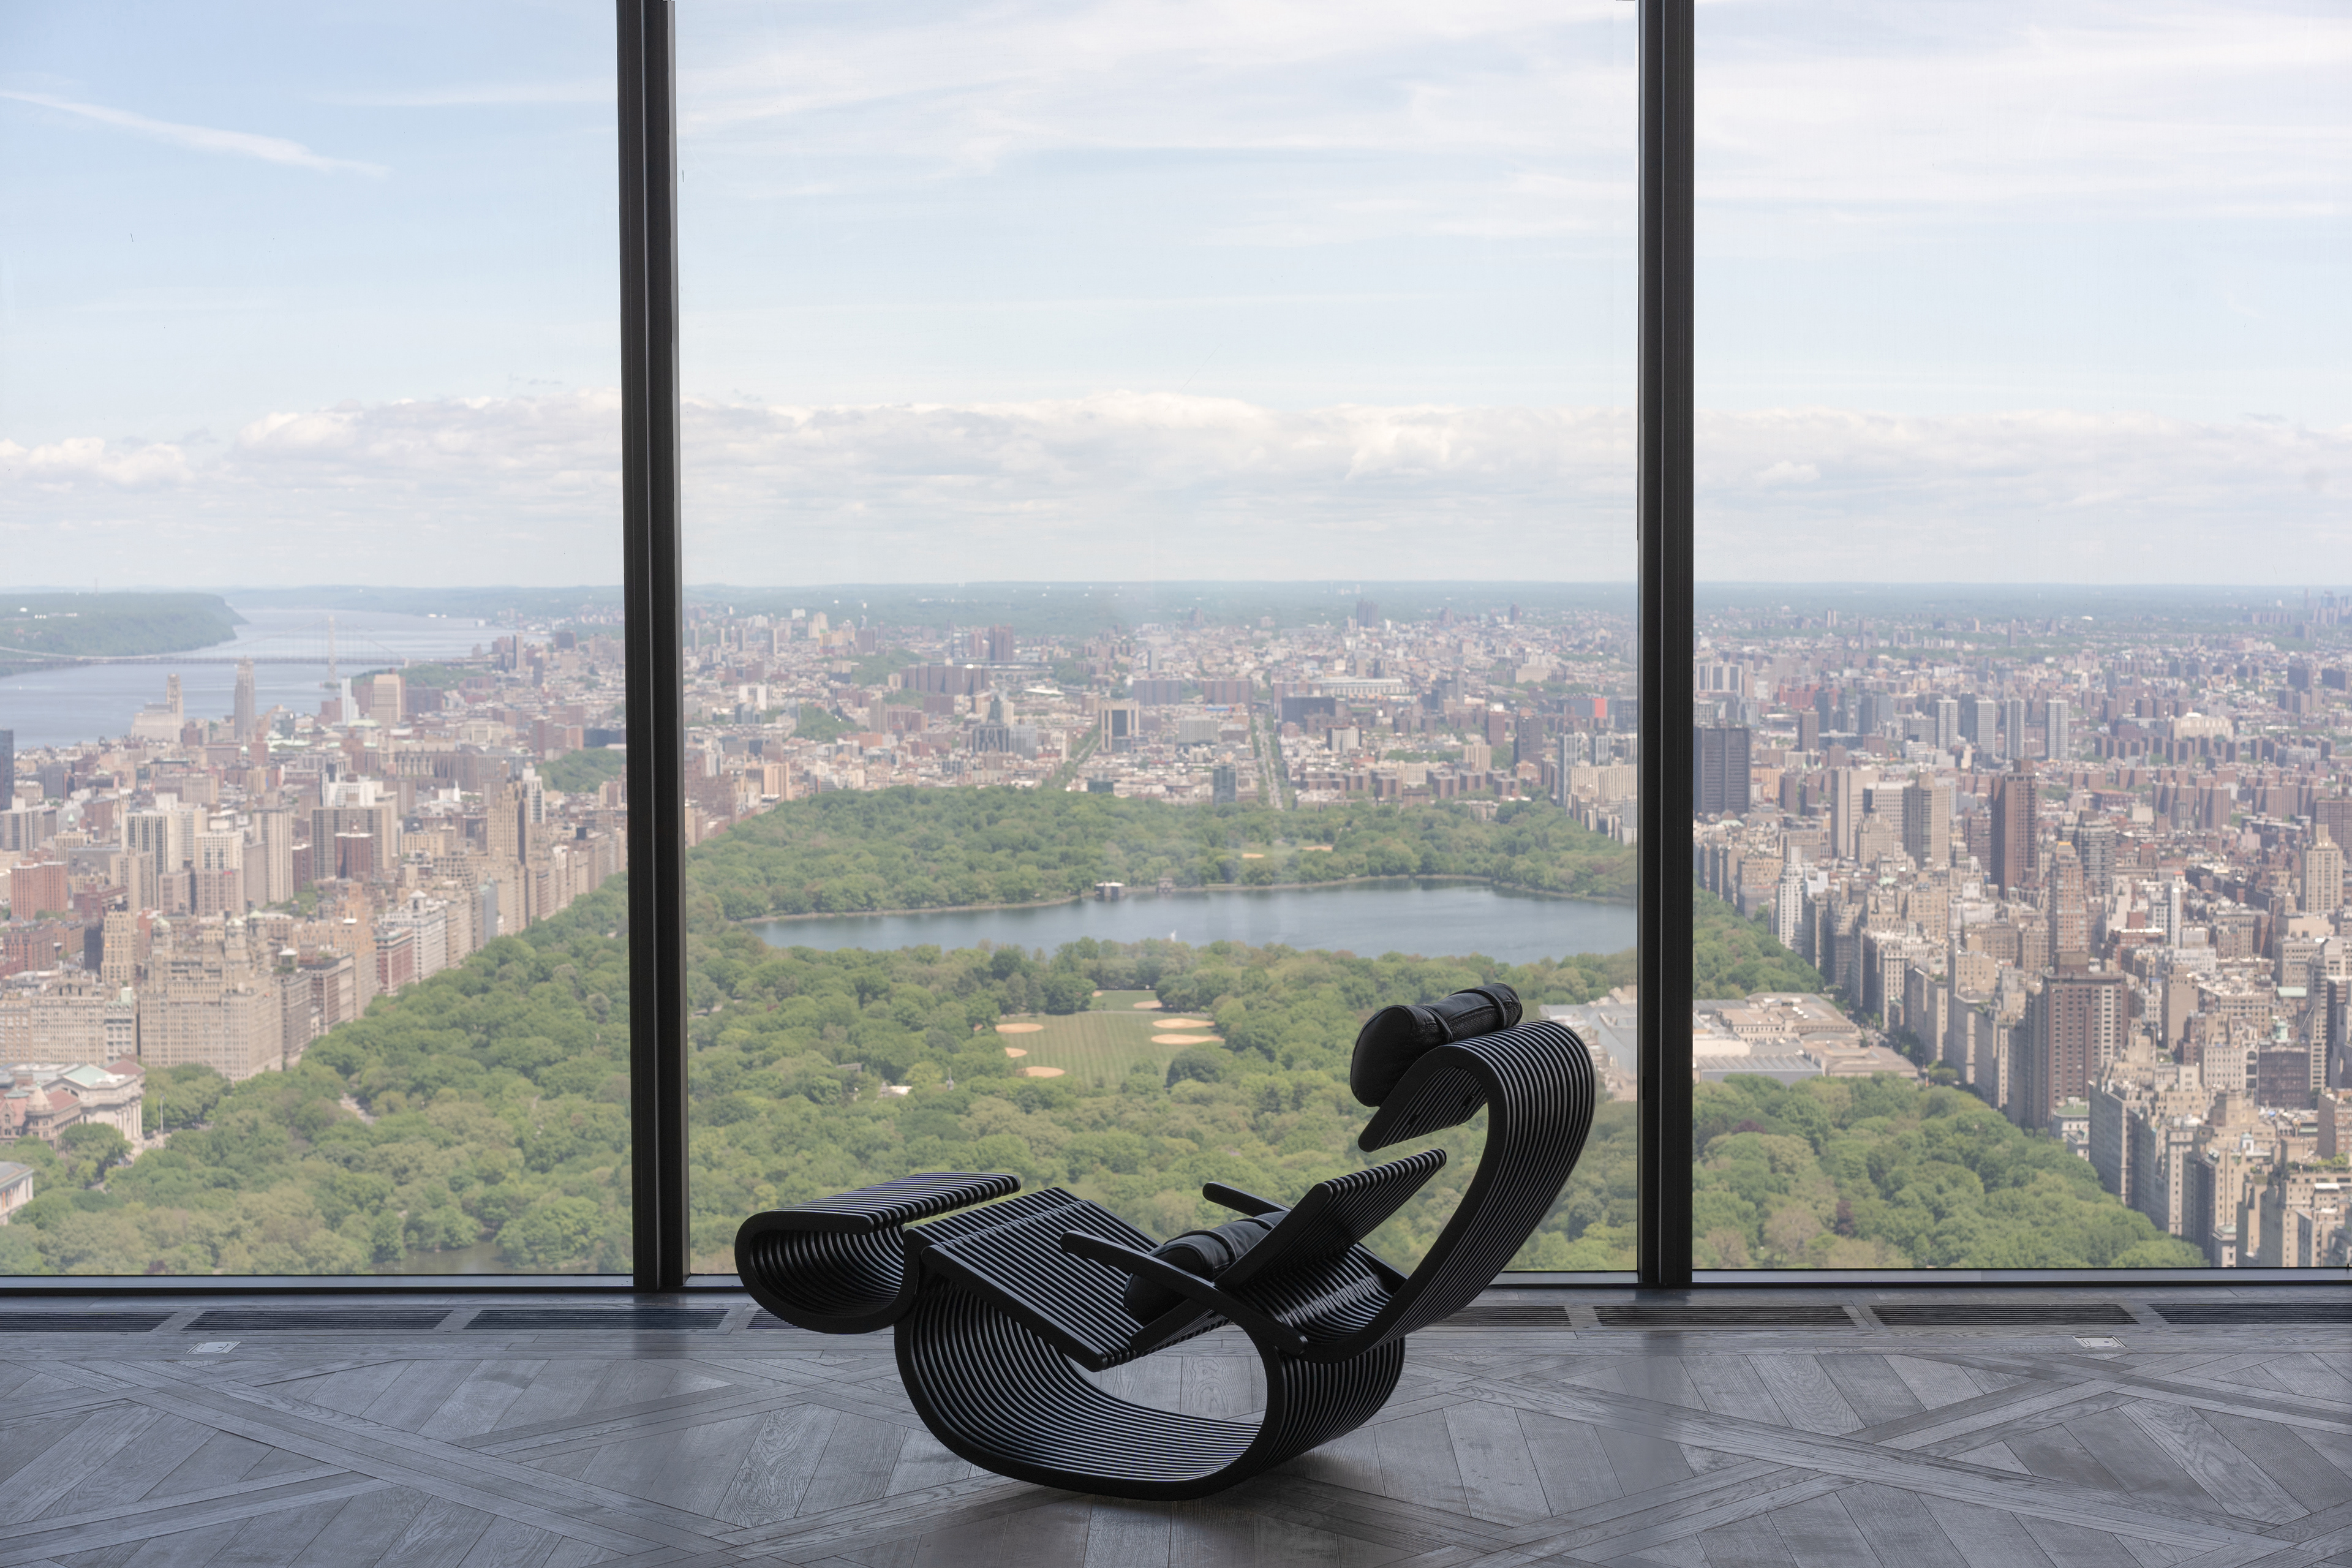
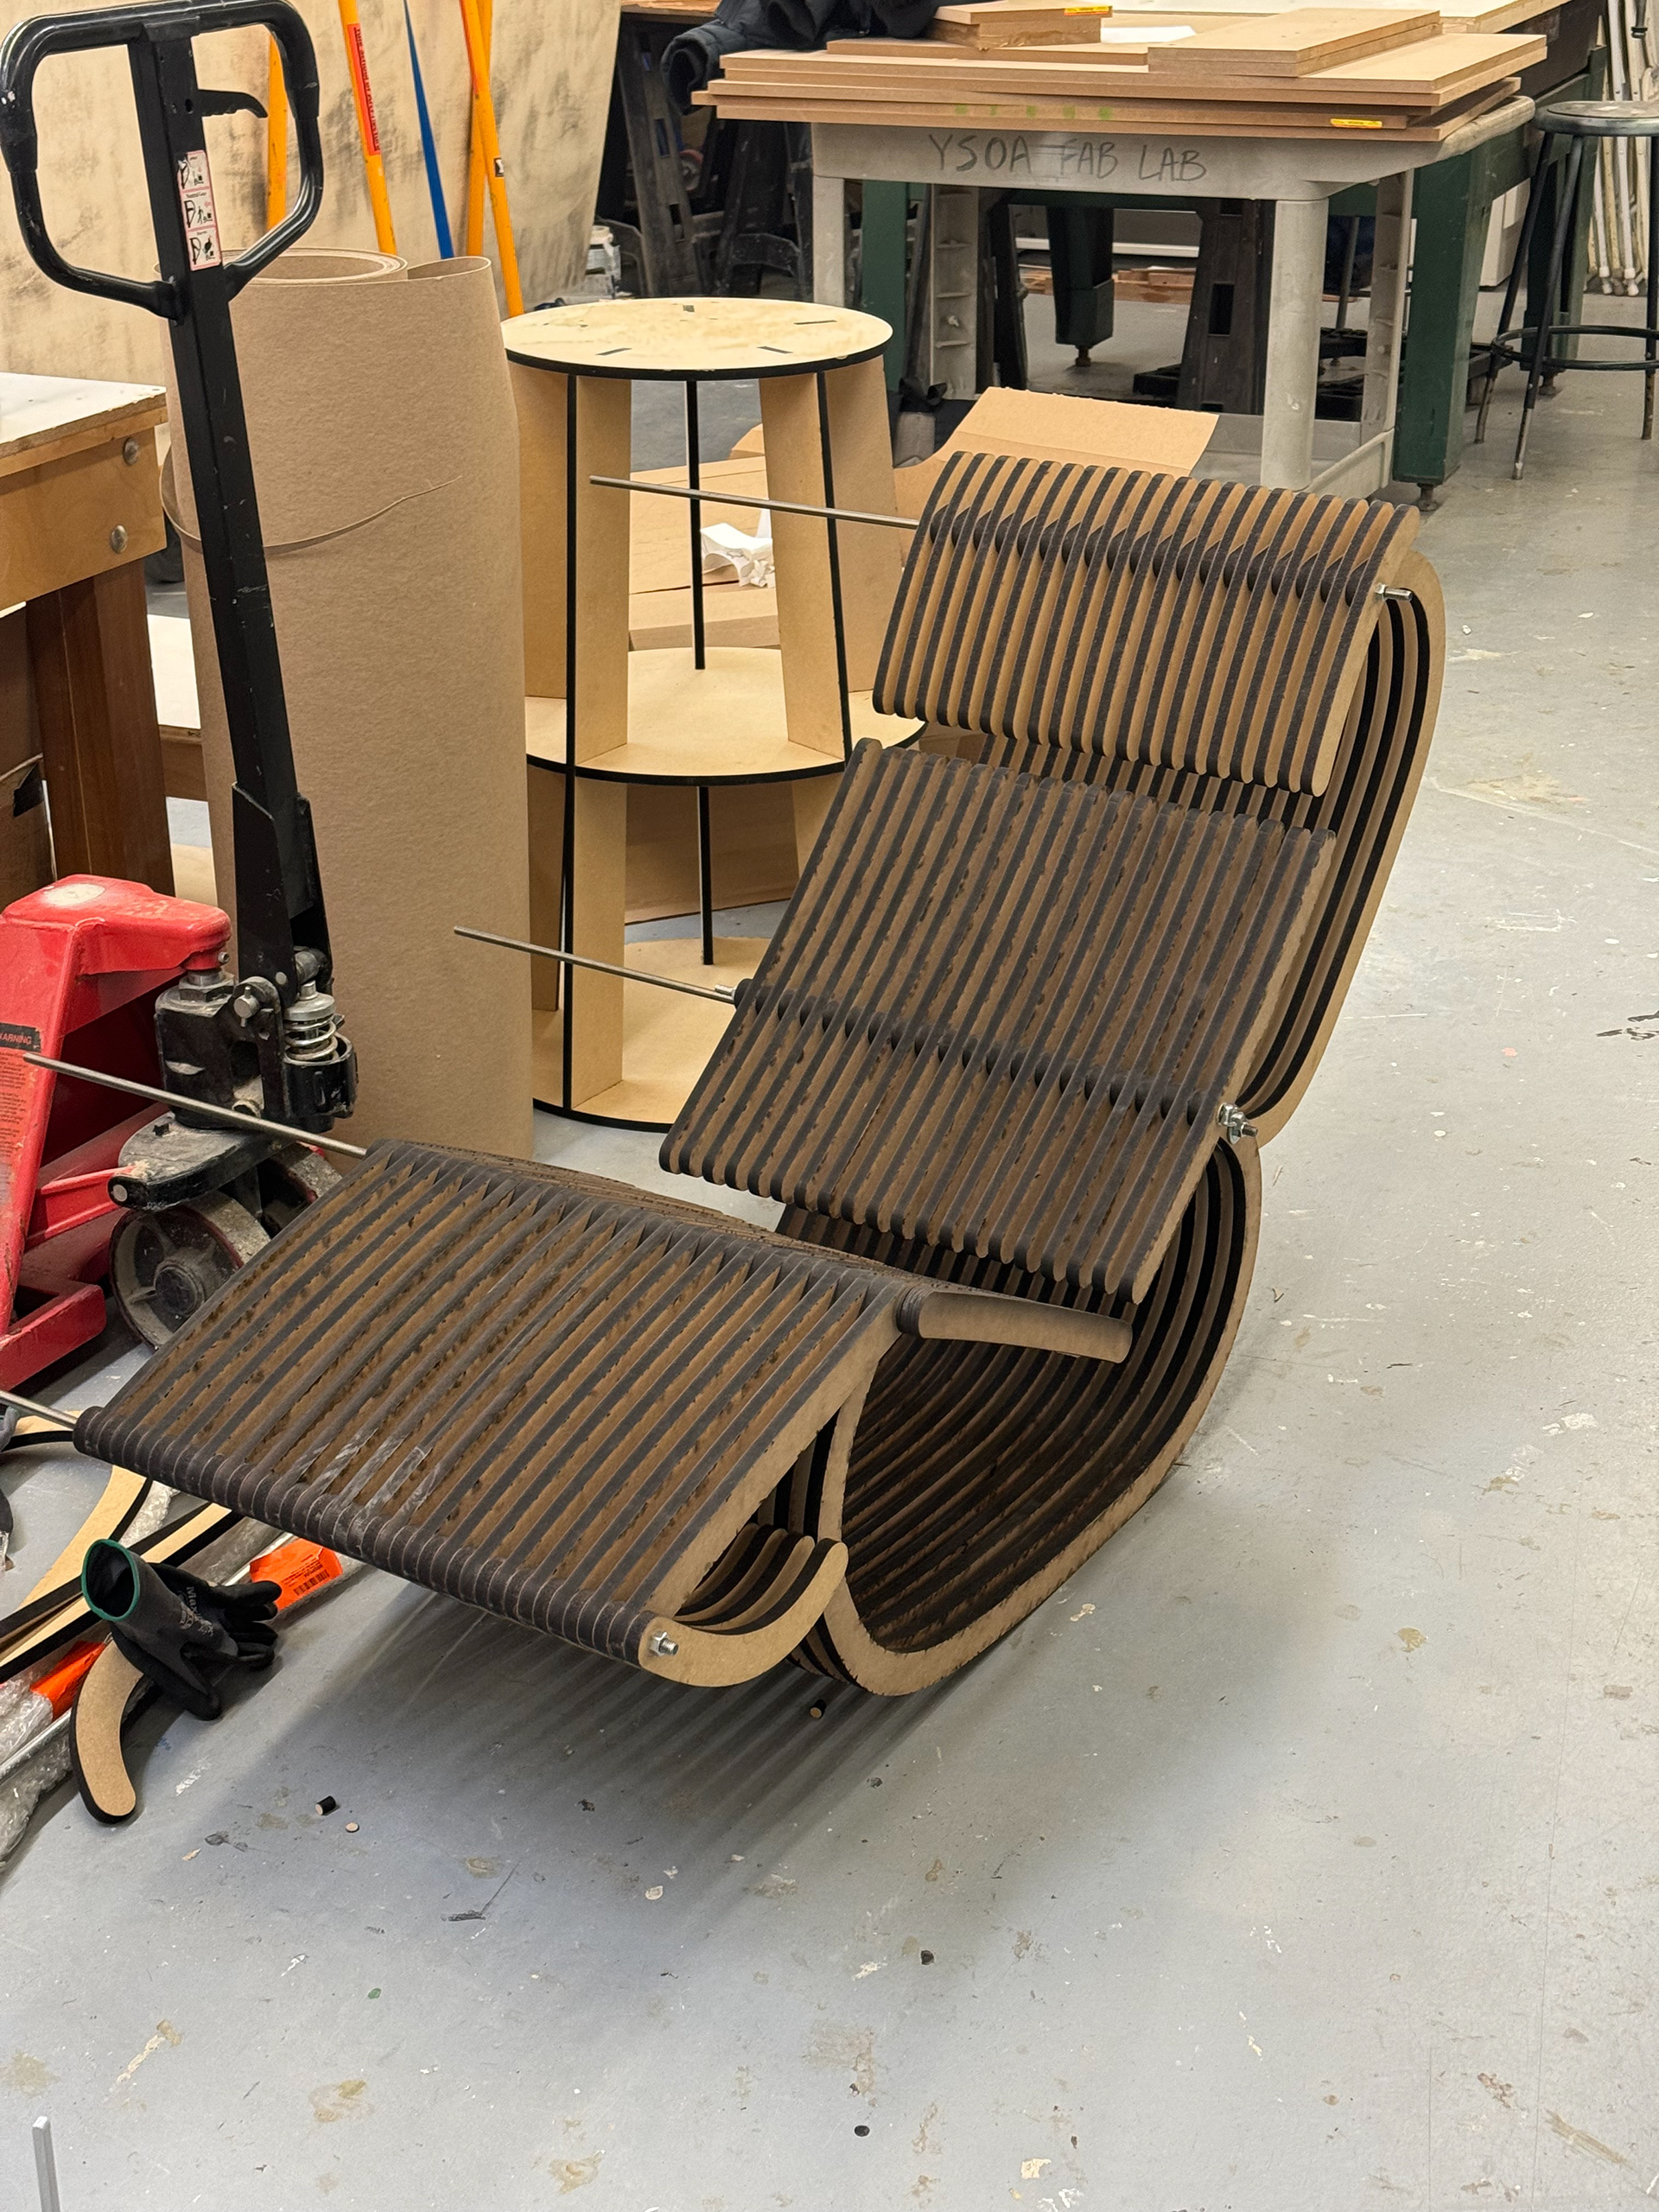
This is no ordinary chair.
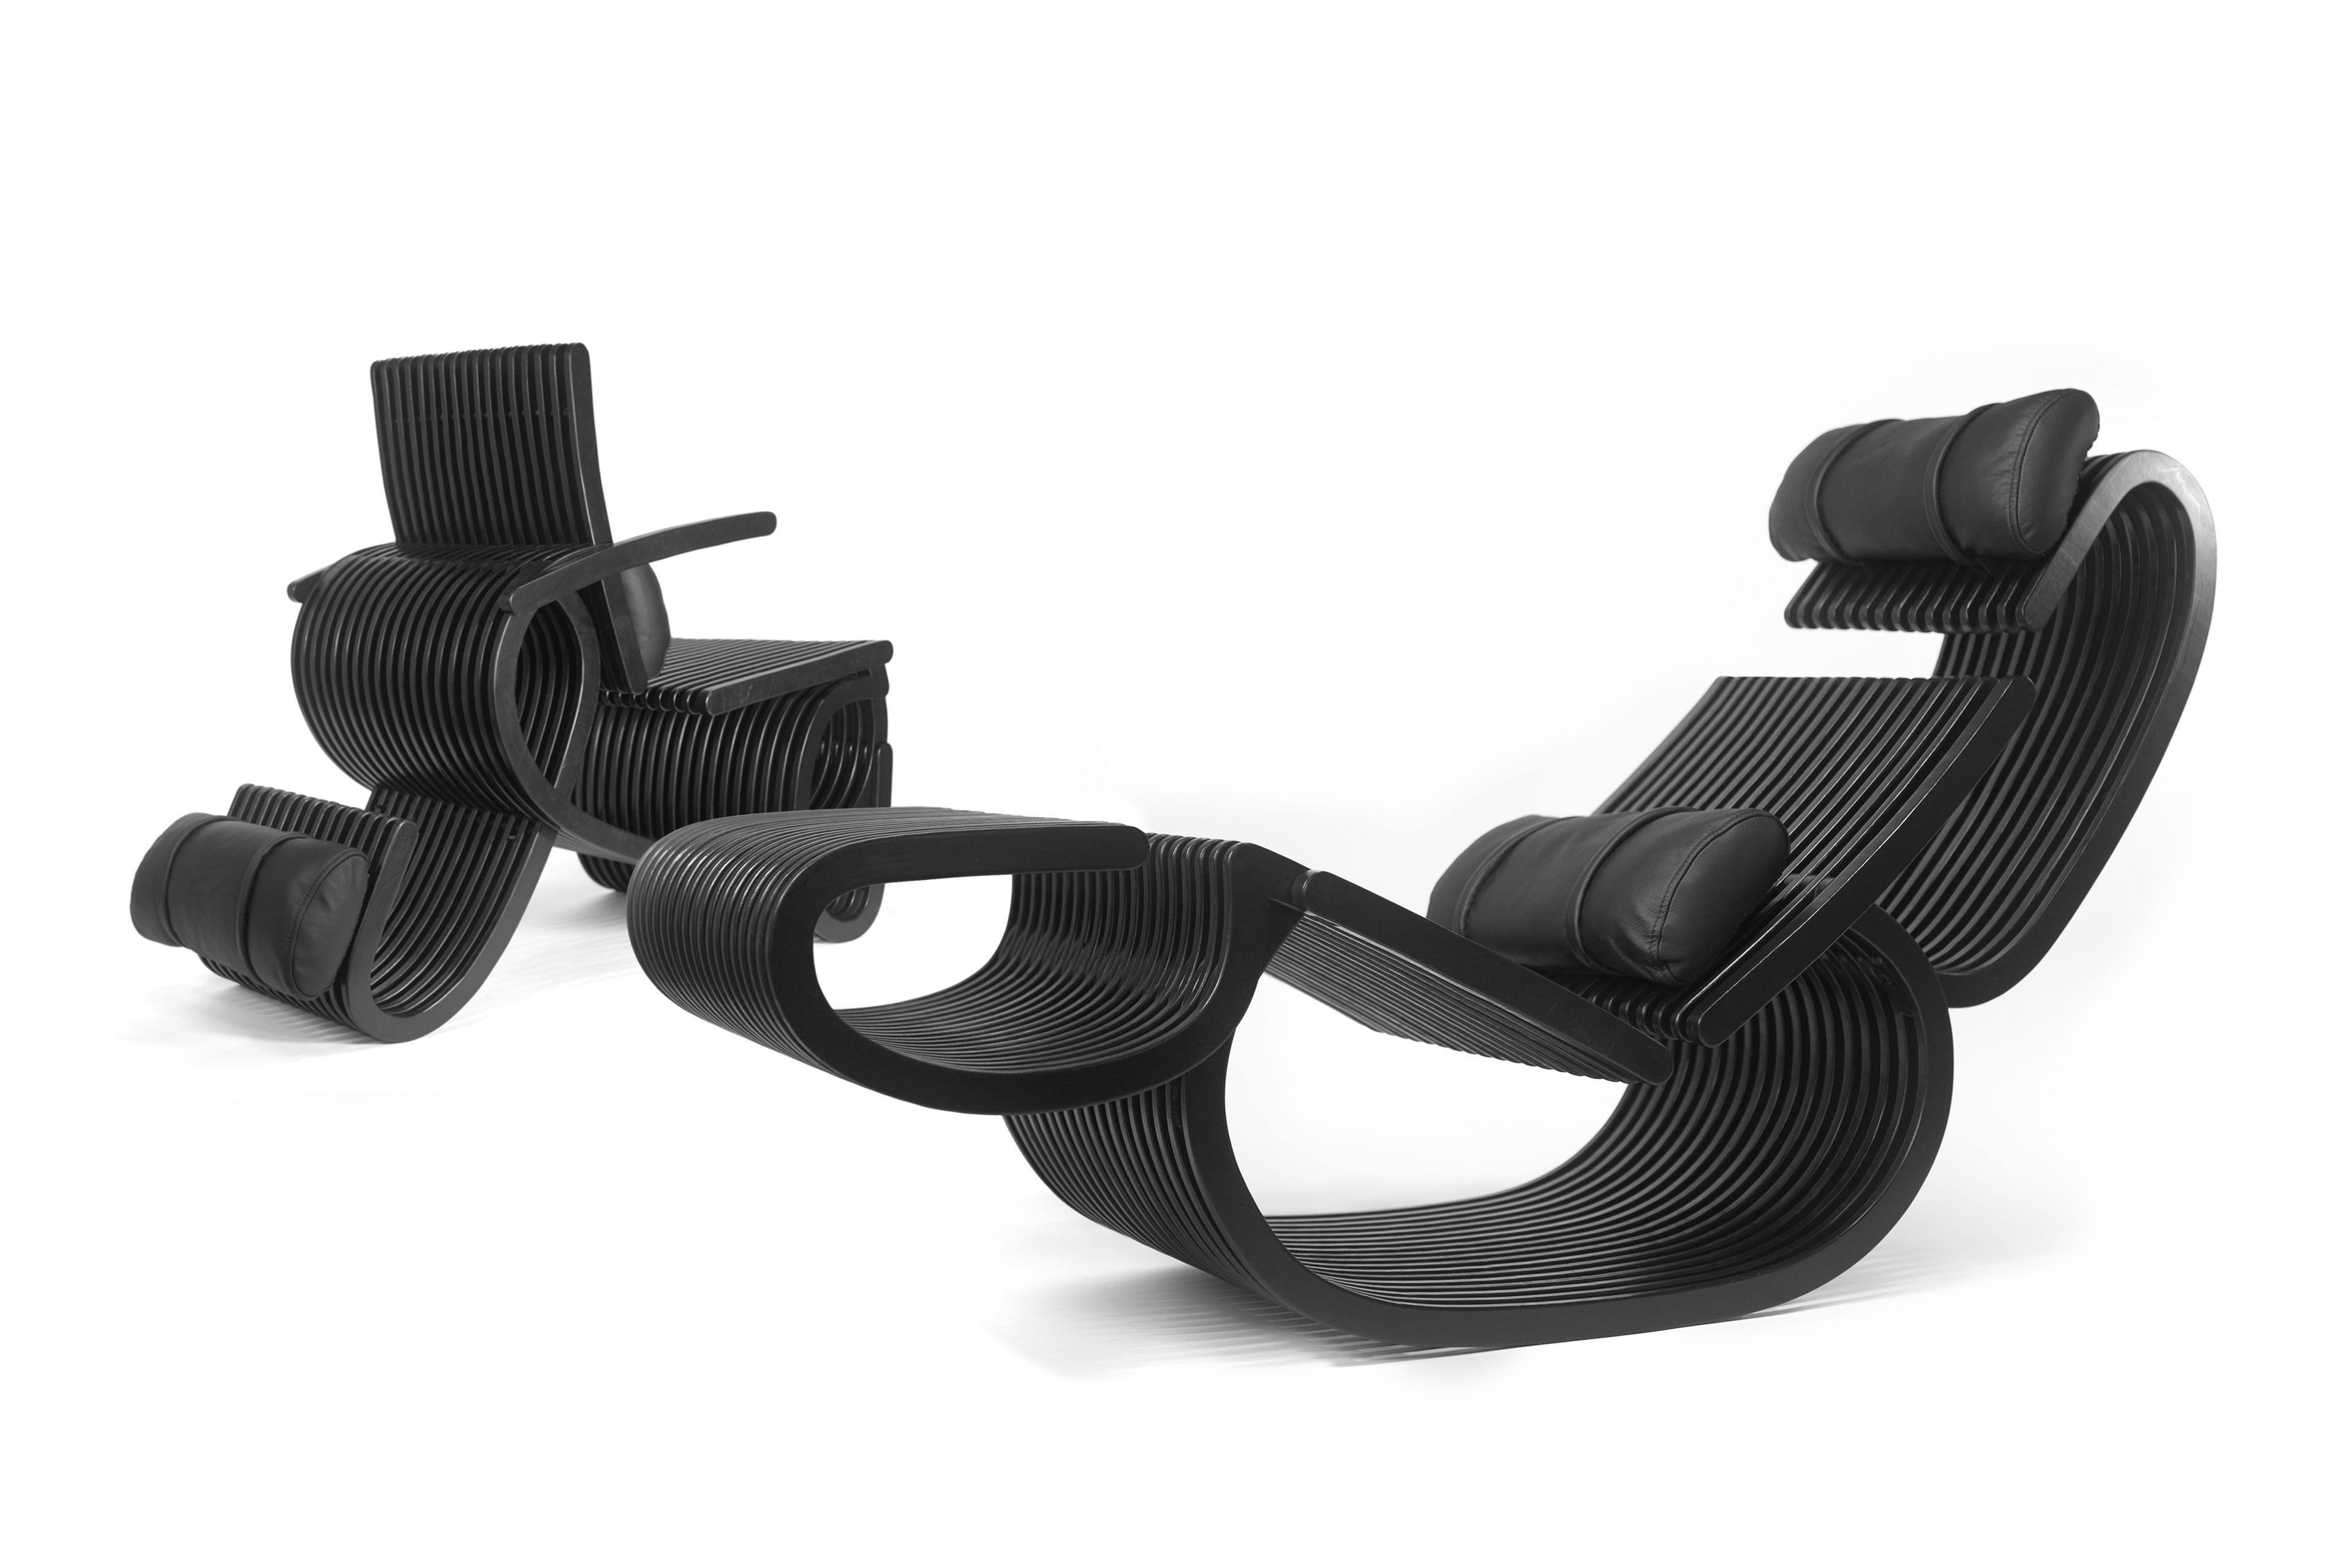
A chair that shape-shifts.
An armchair, a lounge chair, a chaise longue, all in one.
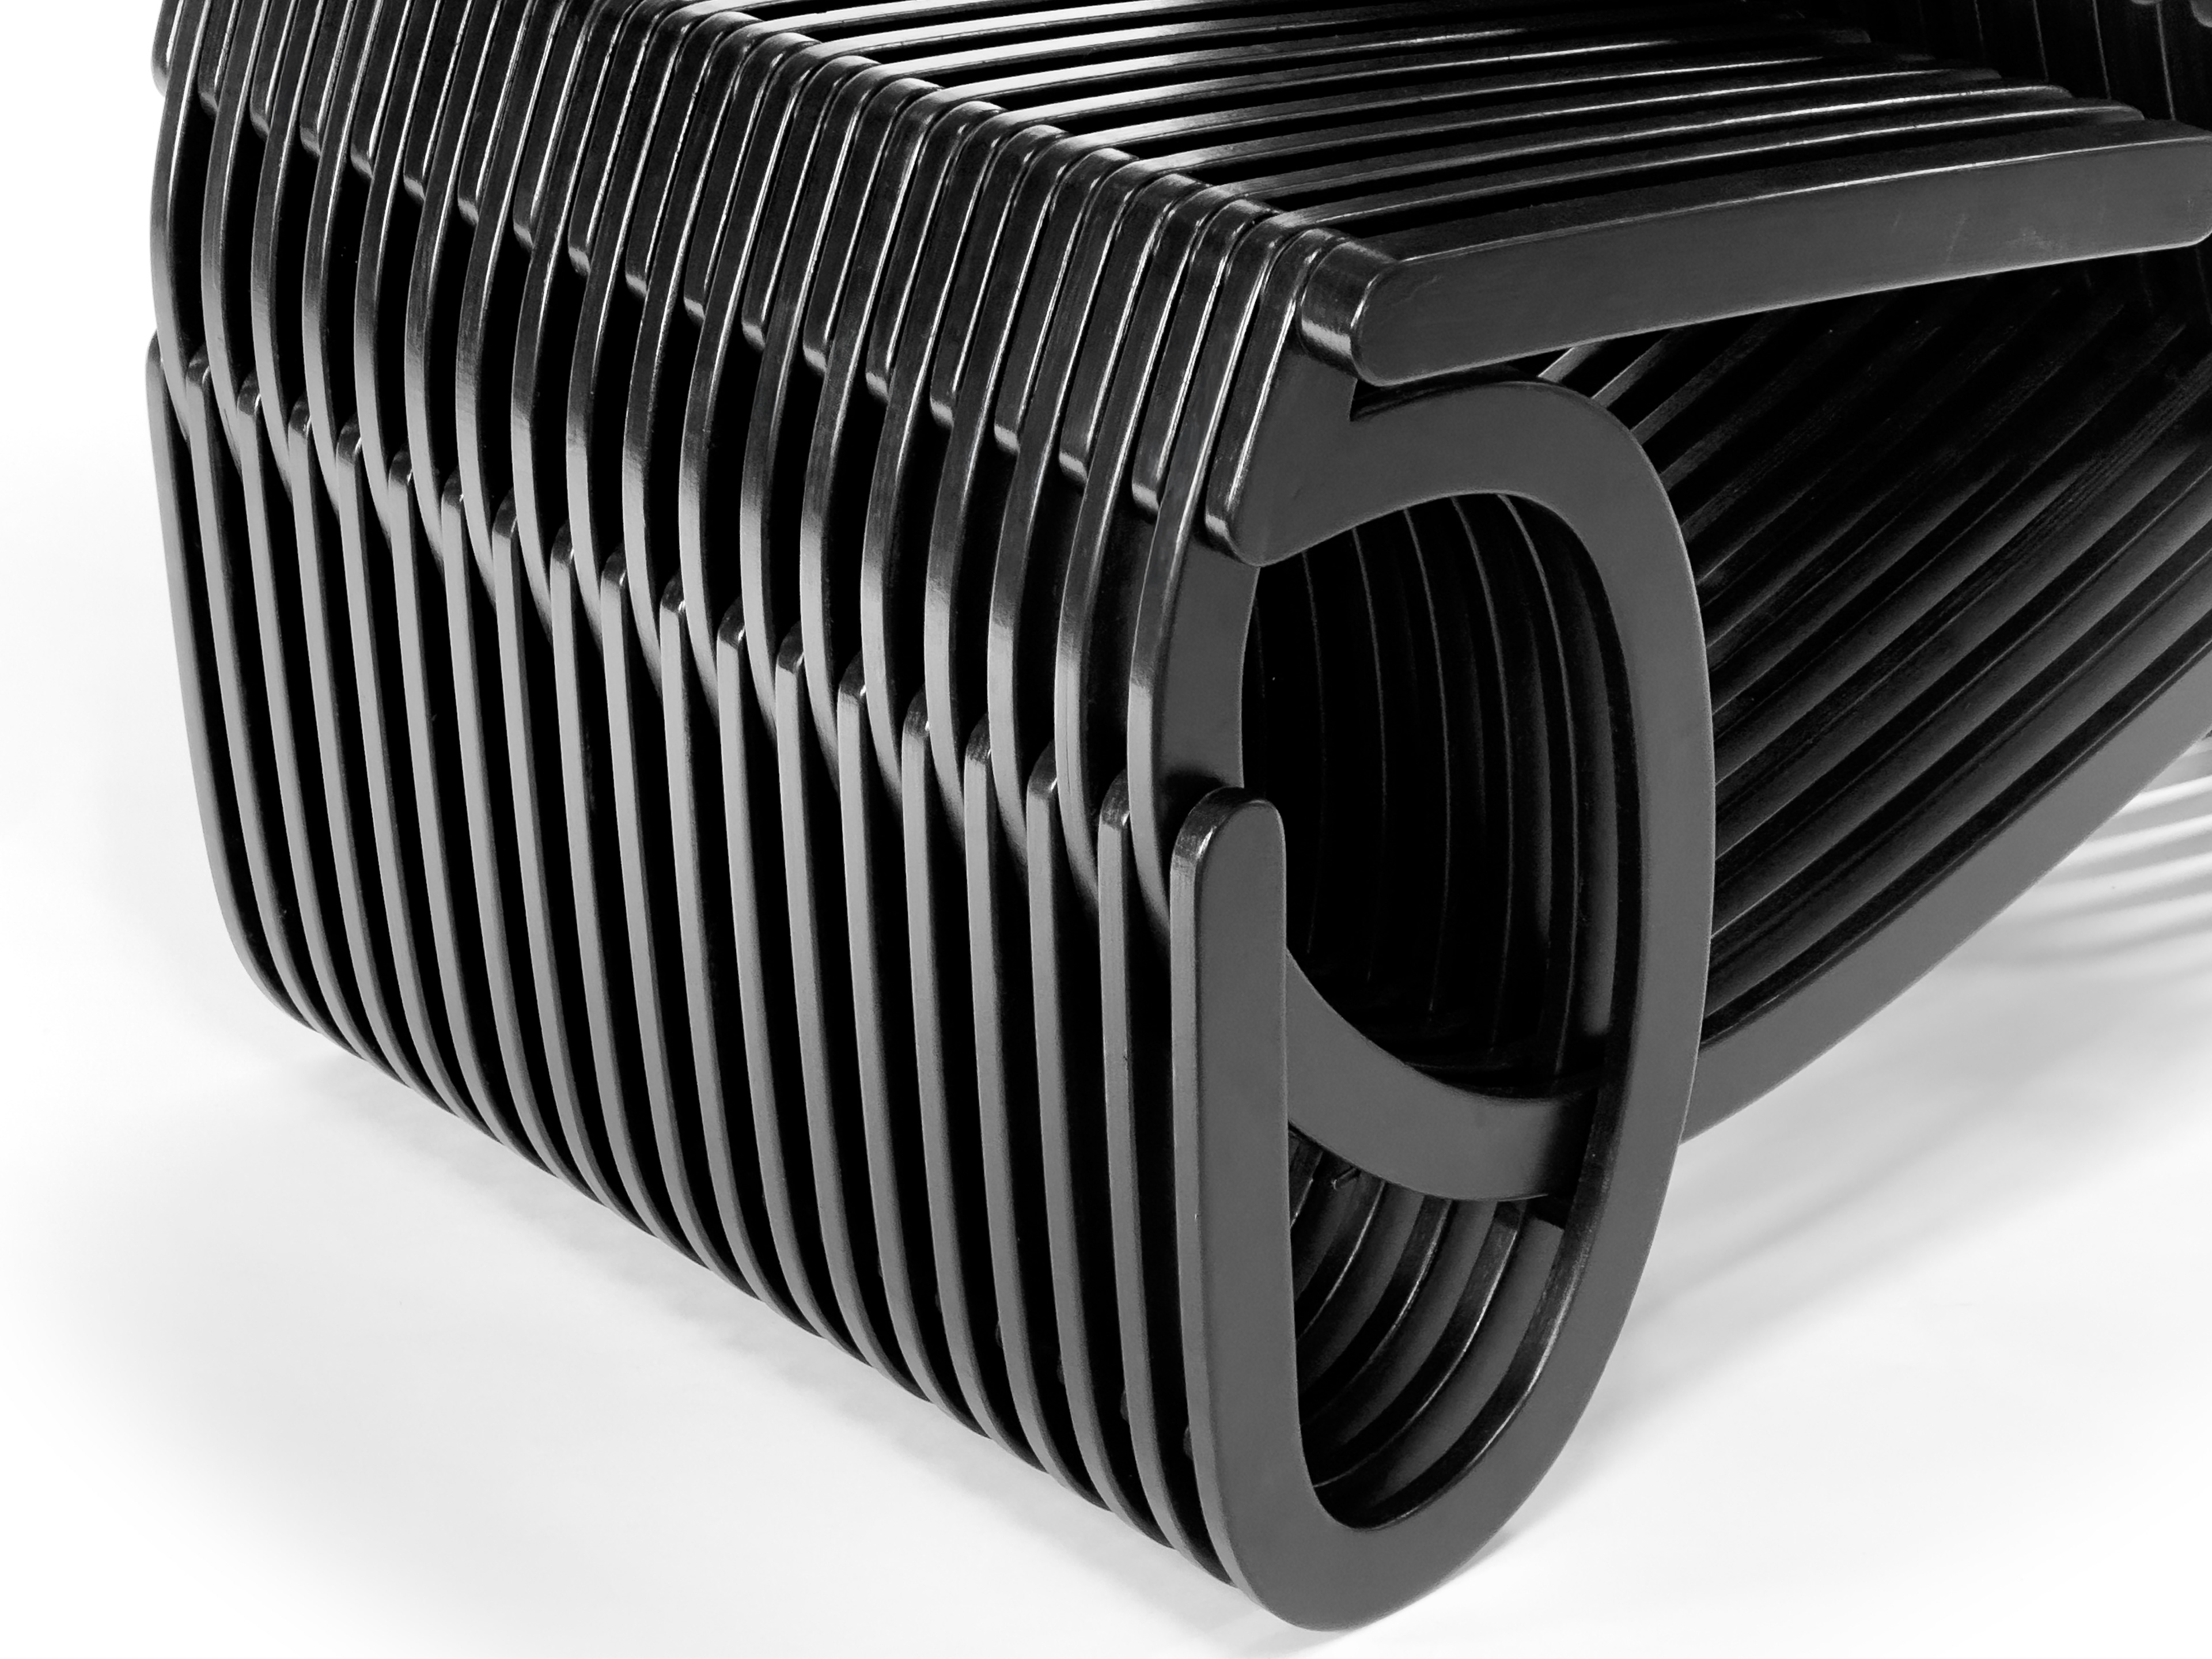
Like many chairs, it begins with five familiar parts: a base, seat, backrest, legrest, and headrest.
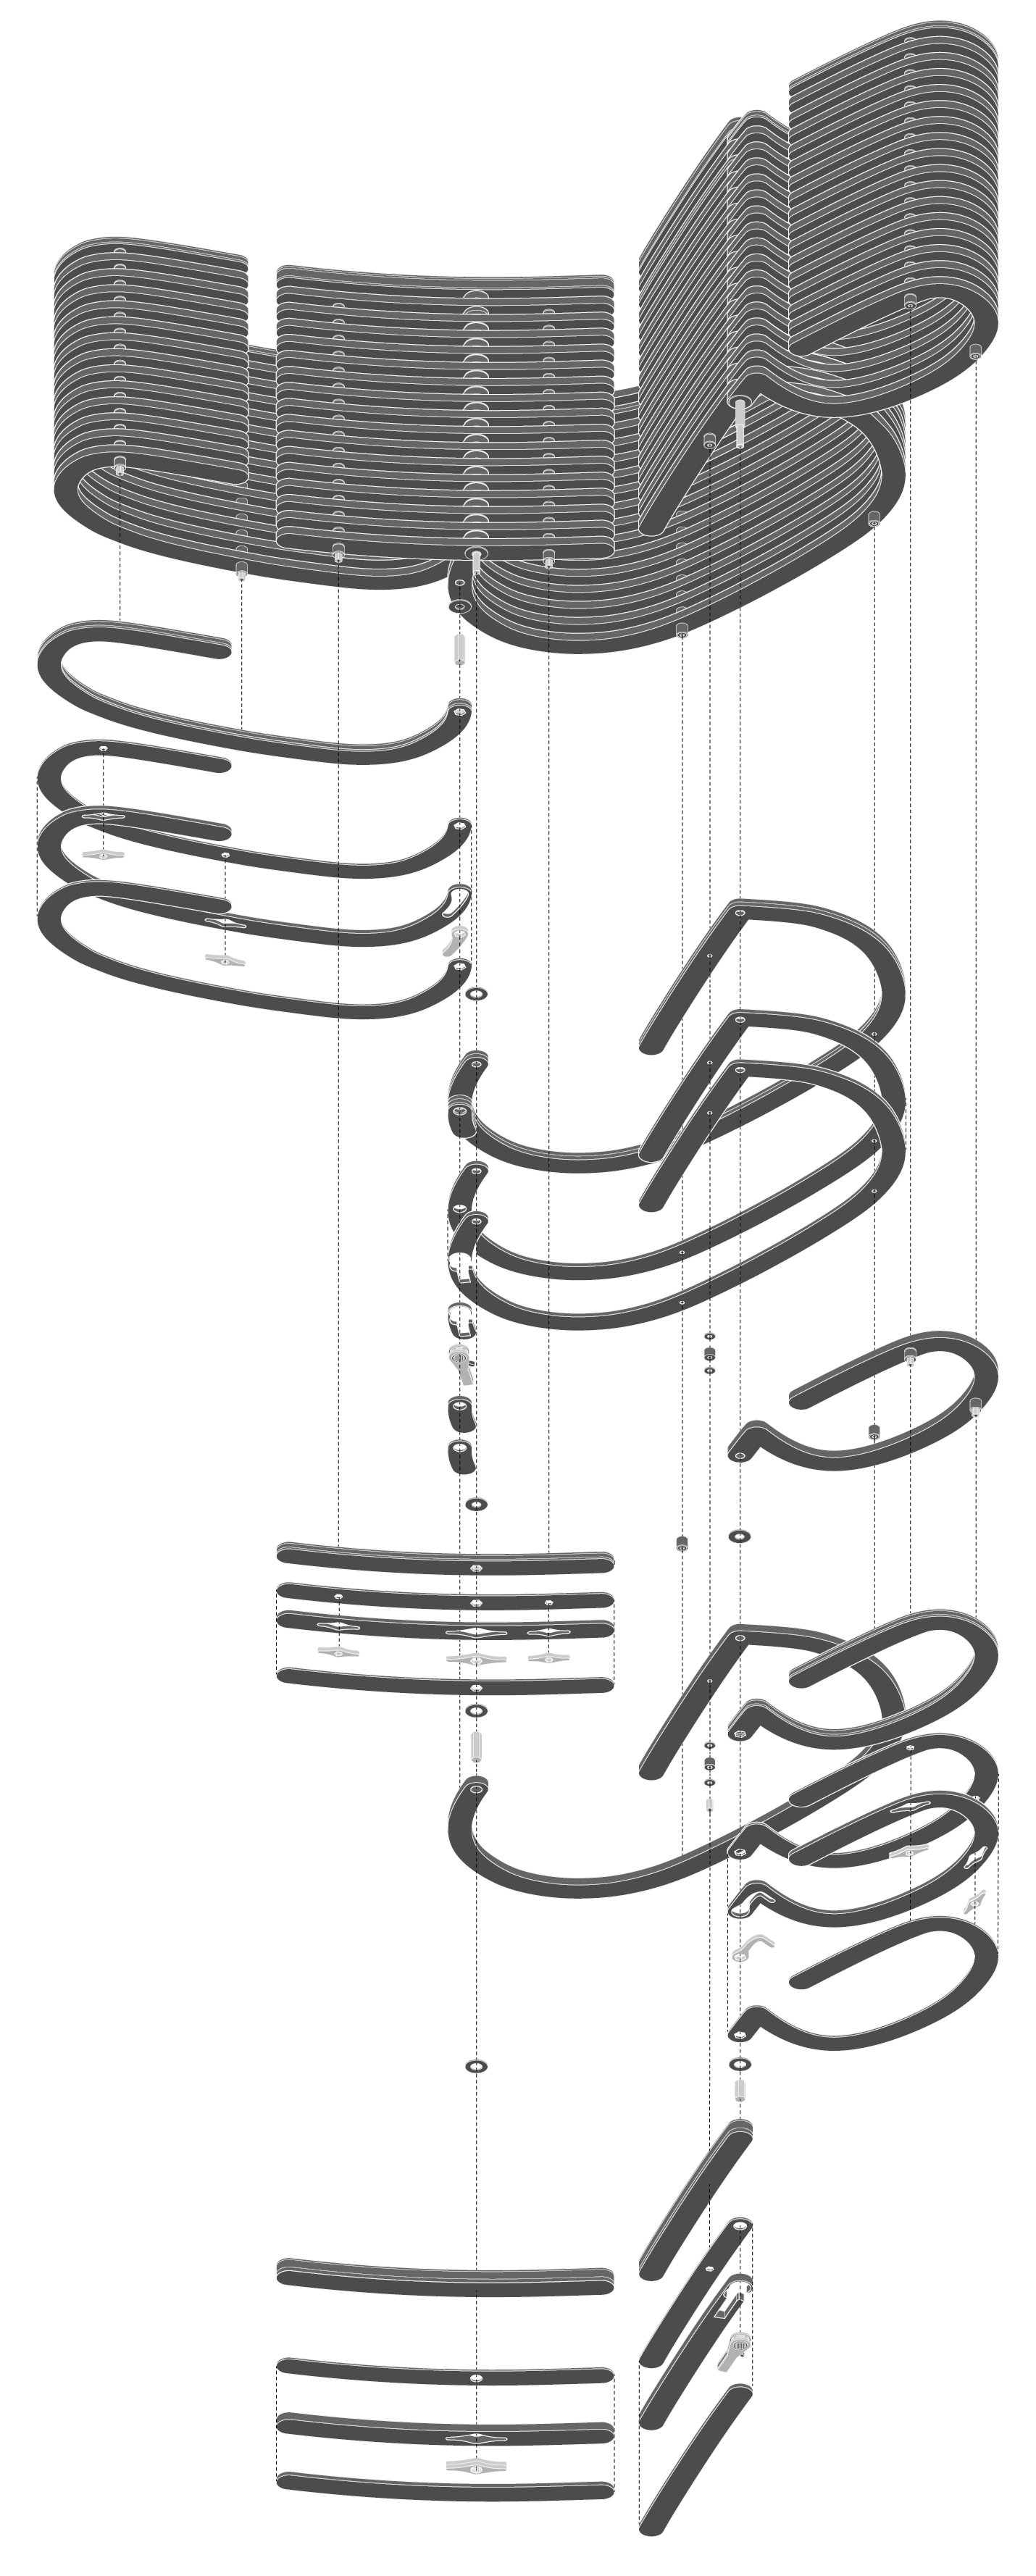
Yet beneath that seeming simplicity lies a complex anatomy of over 800 individual components — the result of hundreds of hours of design, modeling, and fabrication.
.
.

· · ·
This project formally began in February 2024, during my final semester as a graduate student at the Yale School of Architecture.
However, its origins trace back six years earlier, to 2018, during my first semester as an undergraduate architecture student at McGill University.
The final assignment for my studio class was to design and build a chair using only cardboard. In order to set myself apart, I set out to create a chair that was simultaneously an armchair and a rocking chair.

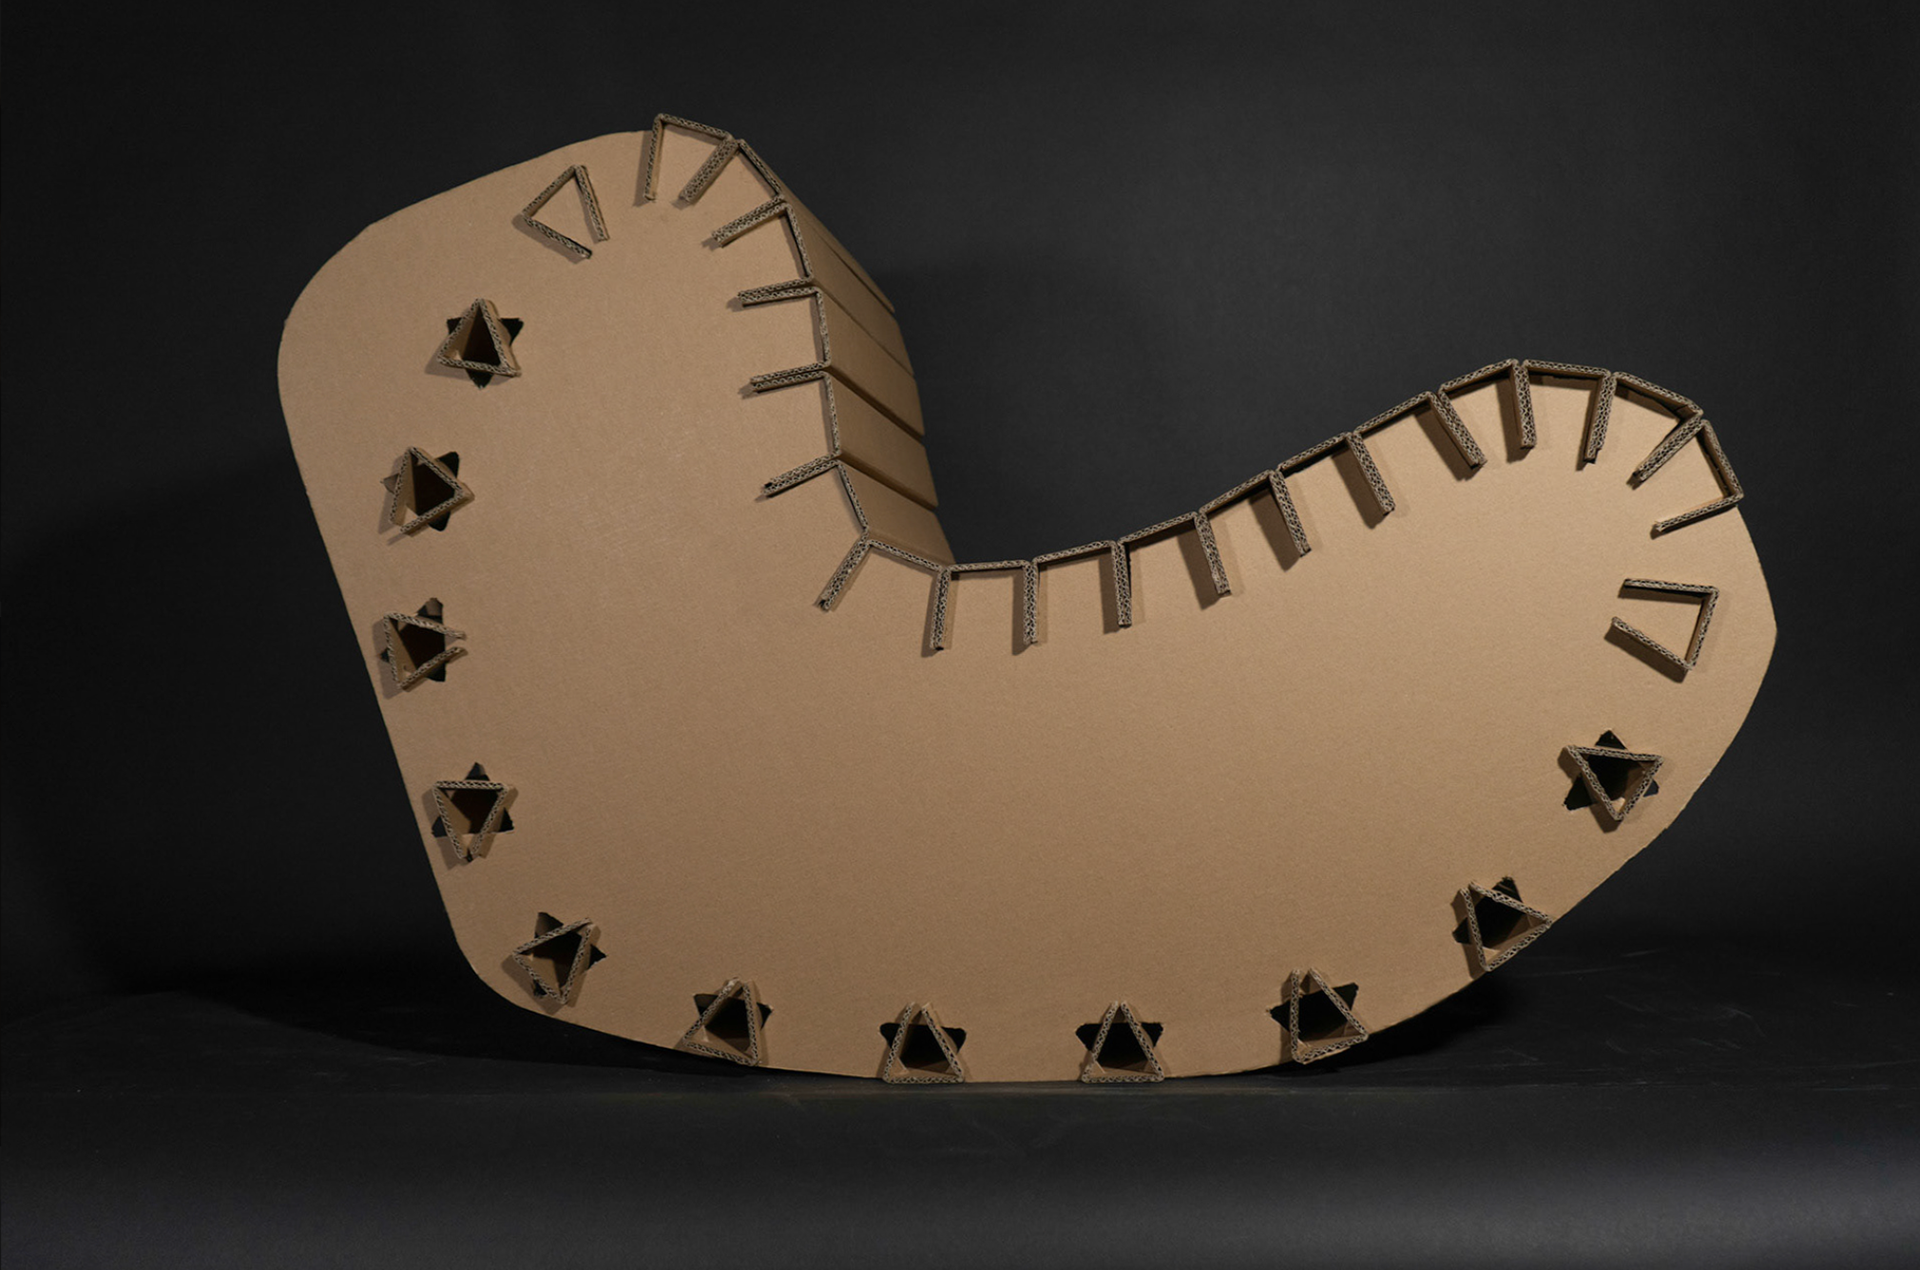
The result was neither practical nor comfortable — and ultimately collapsed during review.
Fast forward six years to my final semester at Yale.
I was fortunate to enroll in The Chair, an elective course that offered the perfect opportunity to revisit my failed undergraduate concept — only this time, with six years of architectural training behind me and a fully equipped shop to bring it to life.
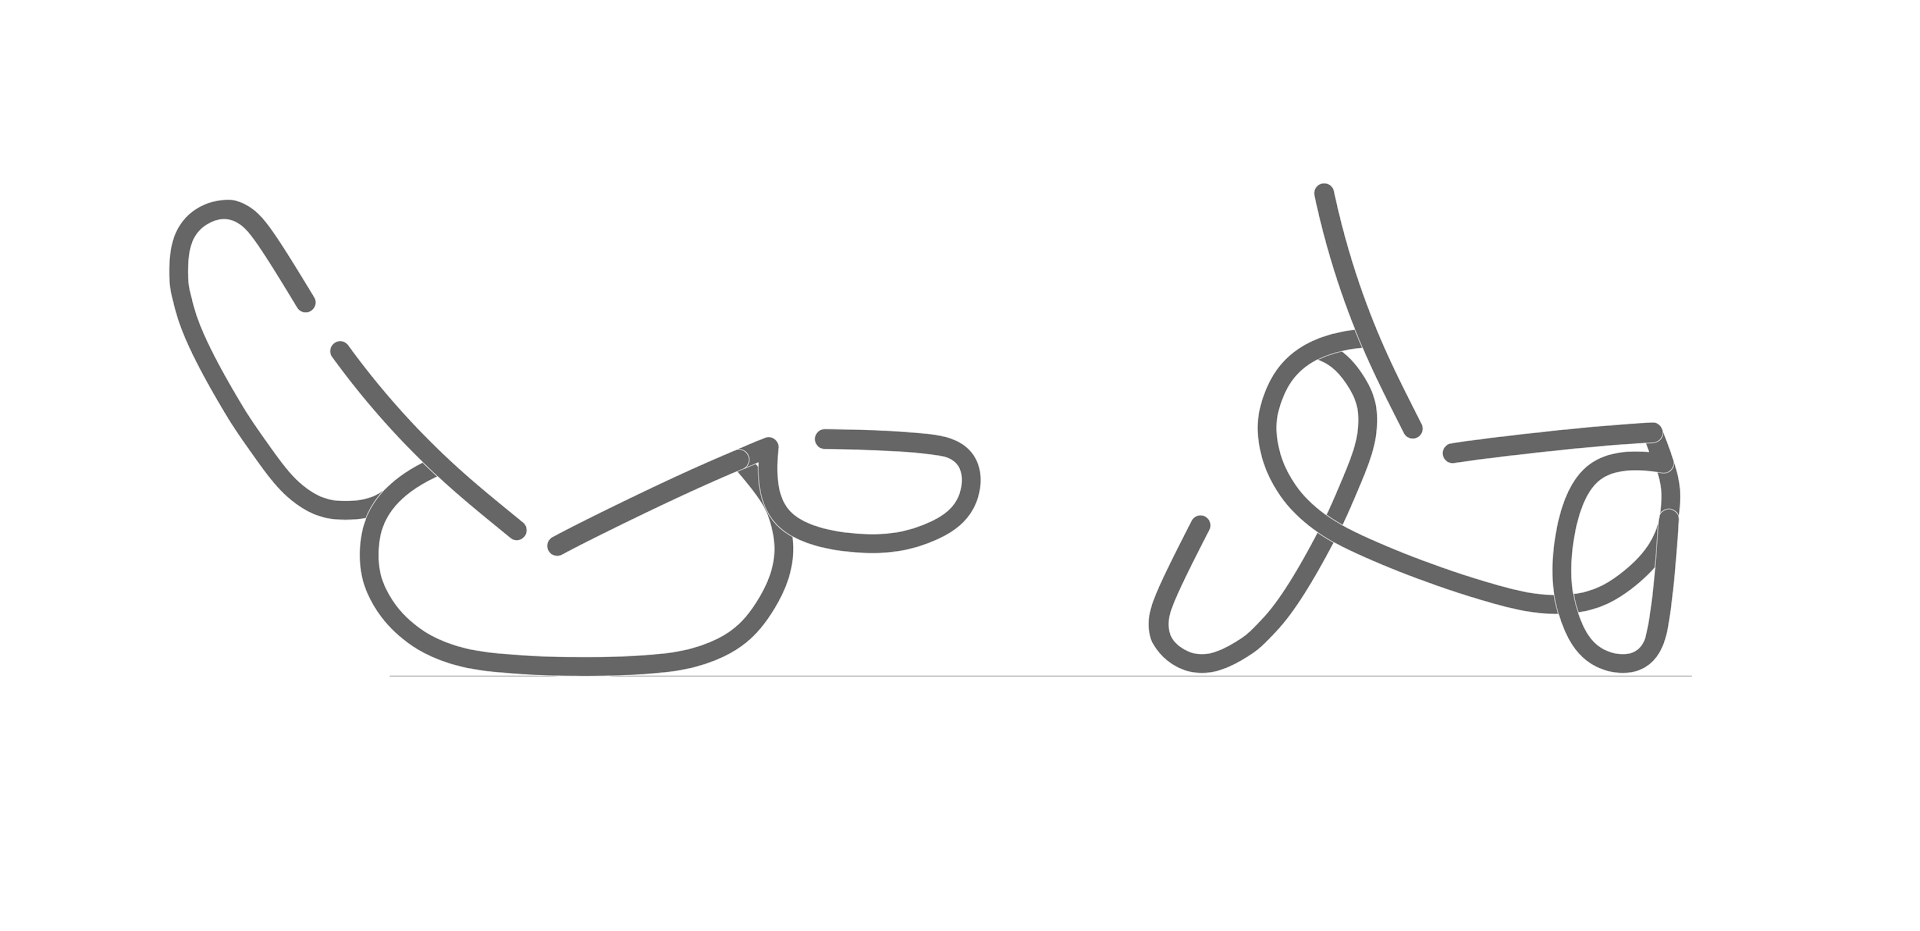
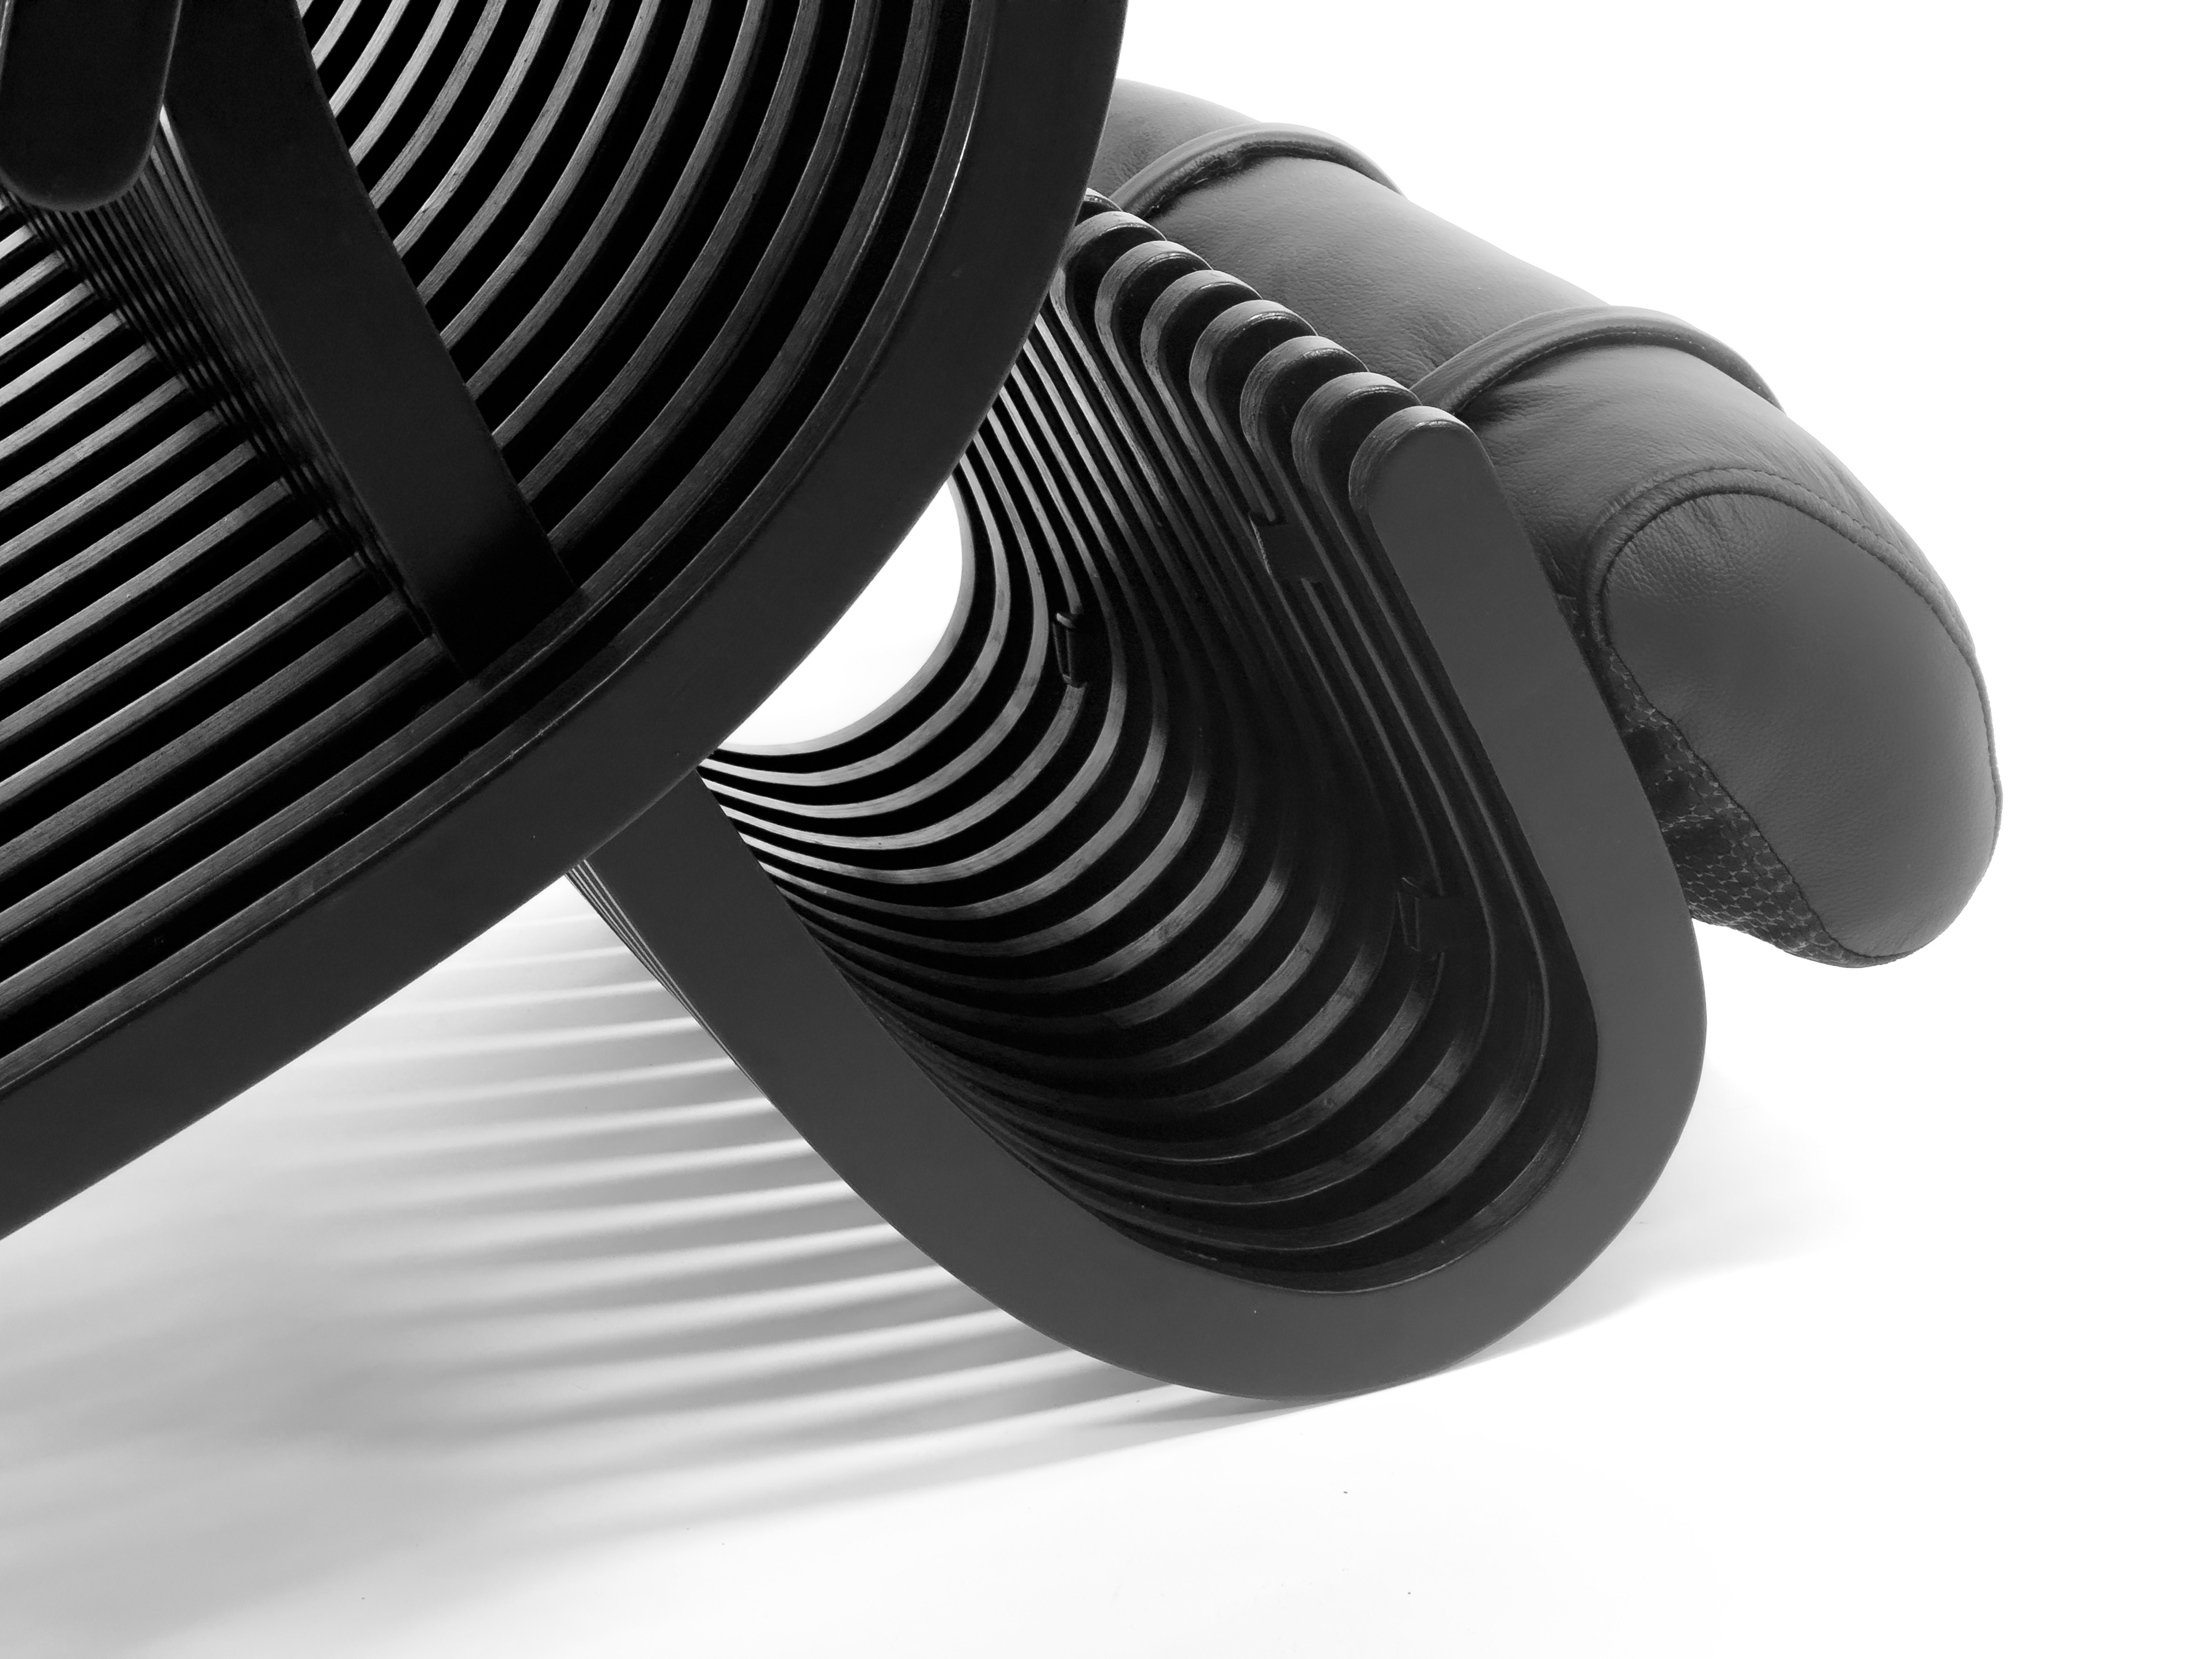
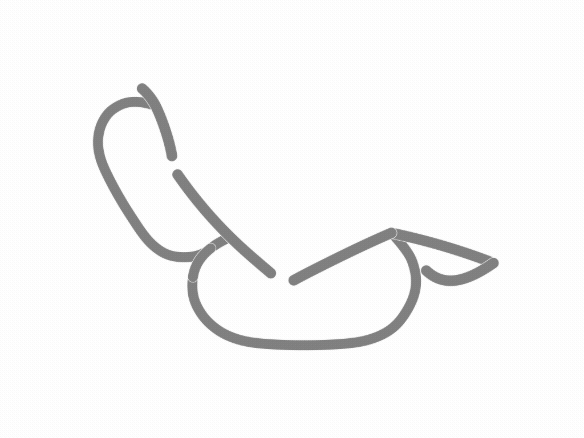
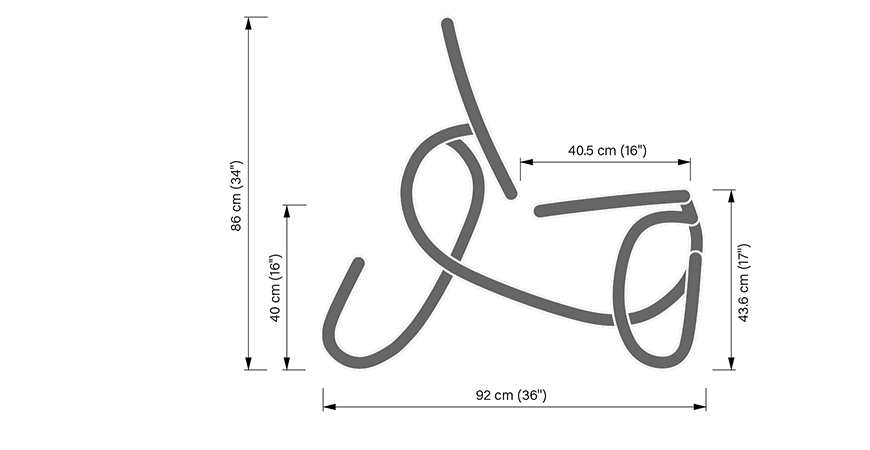
The first design iteration established the core mechanics: in the transformation from a chaise-lounge to an armchair, the headrest would become the back "legs" and the legrest would become the front "legs".
It was a clear proof of concept, but the design was still quite rough.
Prototype 1.0 was built from laser-cut MDF profiles connected by threaded rods, held rigid through friction by tightening hex nuts at each end.
The design, while somewhat functional, failed to support the body properly. It used the same seat length for both configurations, which made the lounge position too short and uncomfortable.
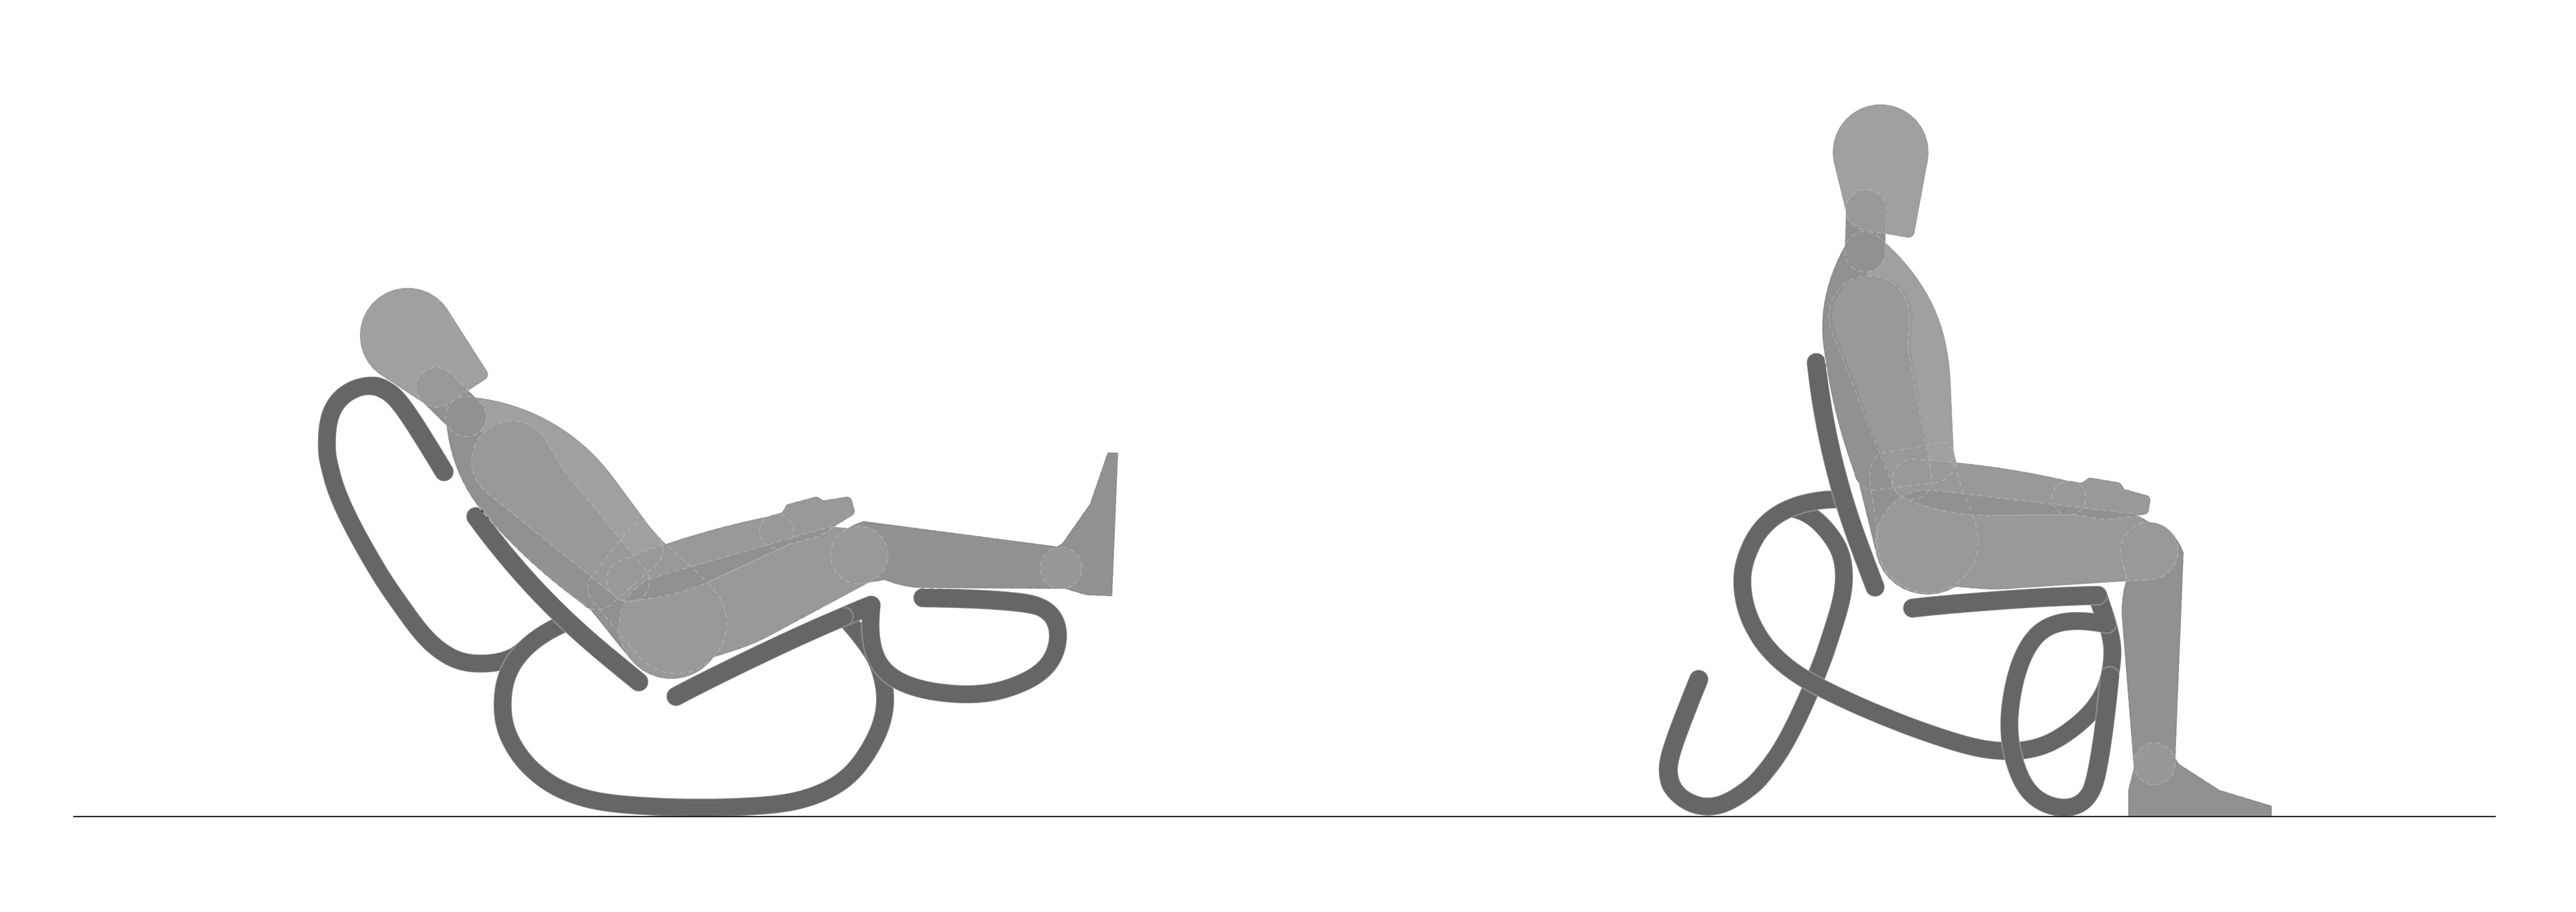
Armchairs and lounge chairs are designed for different postures — the former upright and compact, the latter deeper and more reclined.
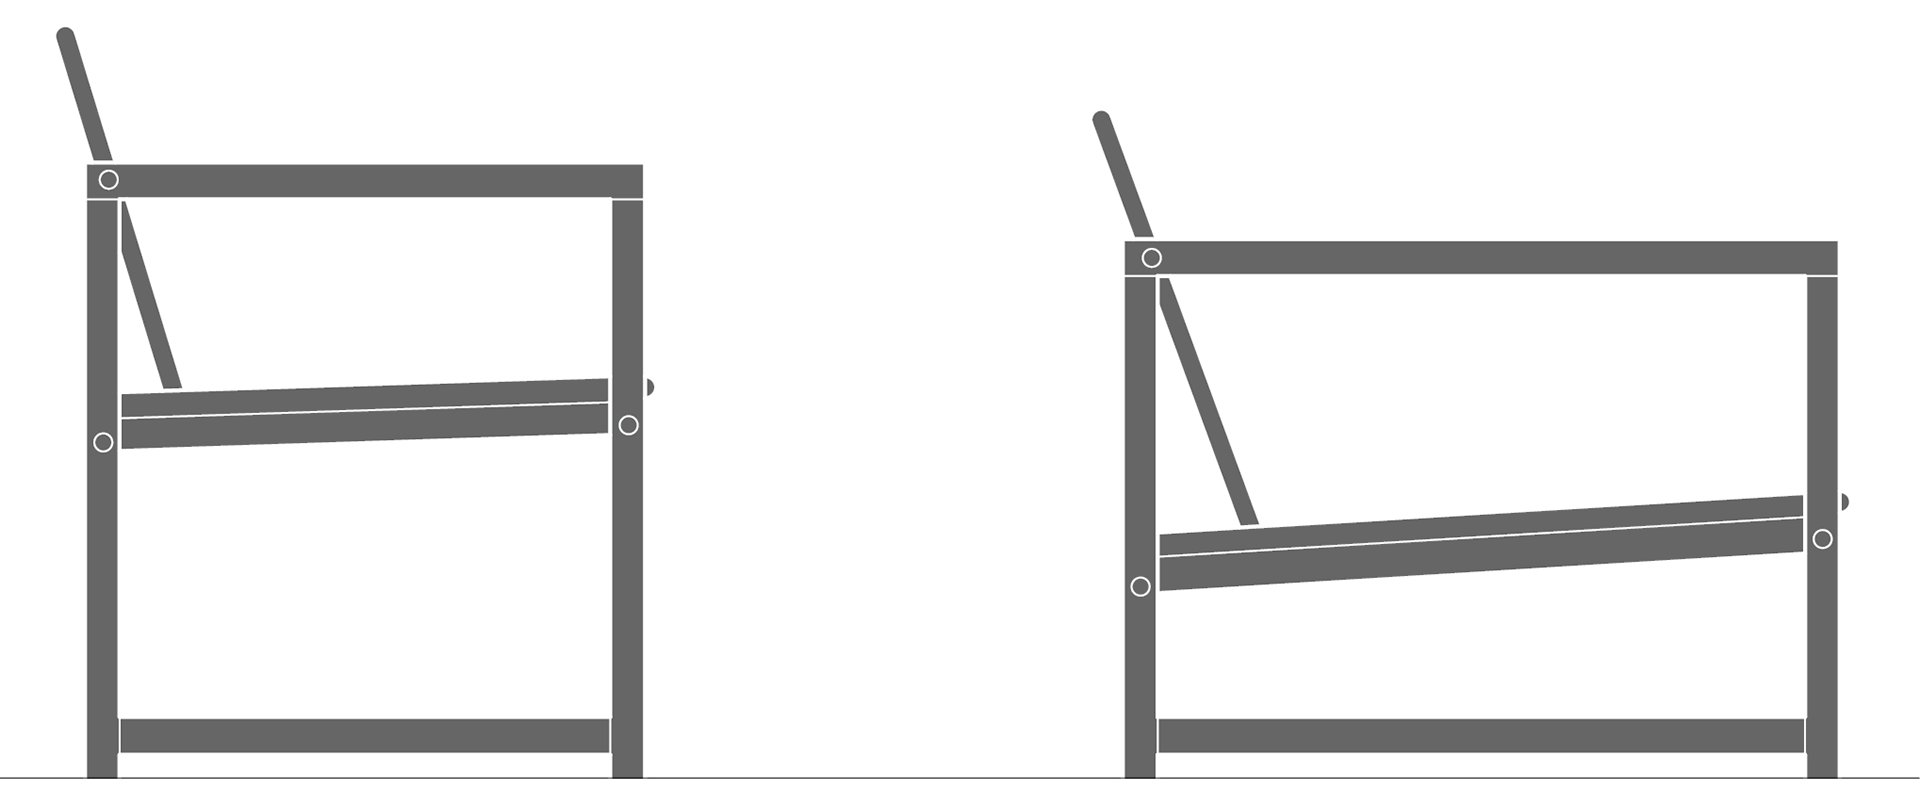
Typical armchair (left) vs. lounge chair (right)
Prototype 2.0 addressed this biomechanical challenge. The legrest was re-engineered to extend the effective seat length when suspended, supporting the upper legs more naturally in the lounge position. The headrest was redesigned to raise the overall seat height further, creating a distinctly more upright posture when converted to an armchair.
However, the method by which the suspended elements were held in place — relying on friction to resist force — proved unsuccessful. After repeated tightening and loosening, the MDF wore down to the point that the friction could no longer support the legrest or headrest under the weight of a user, or even against gravity alone.
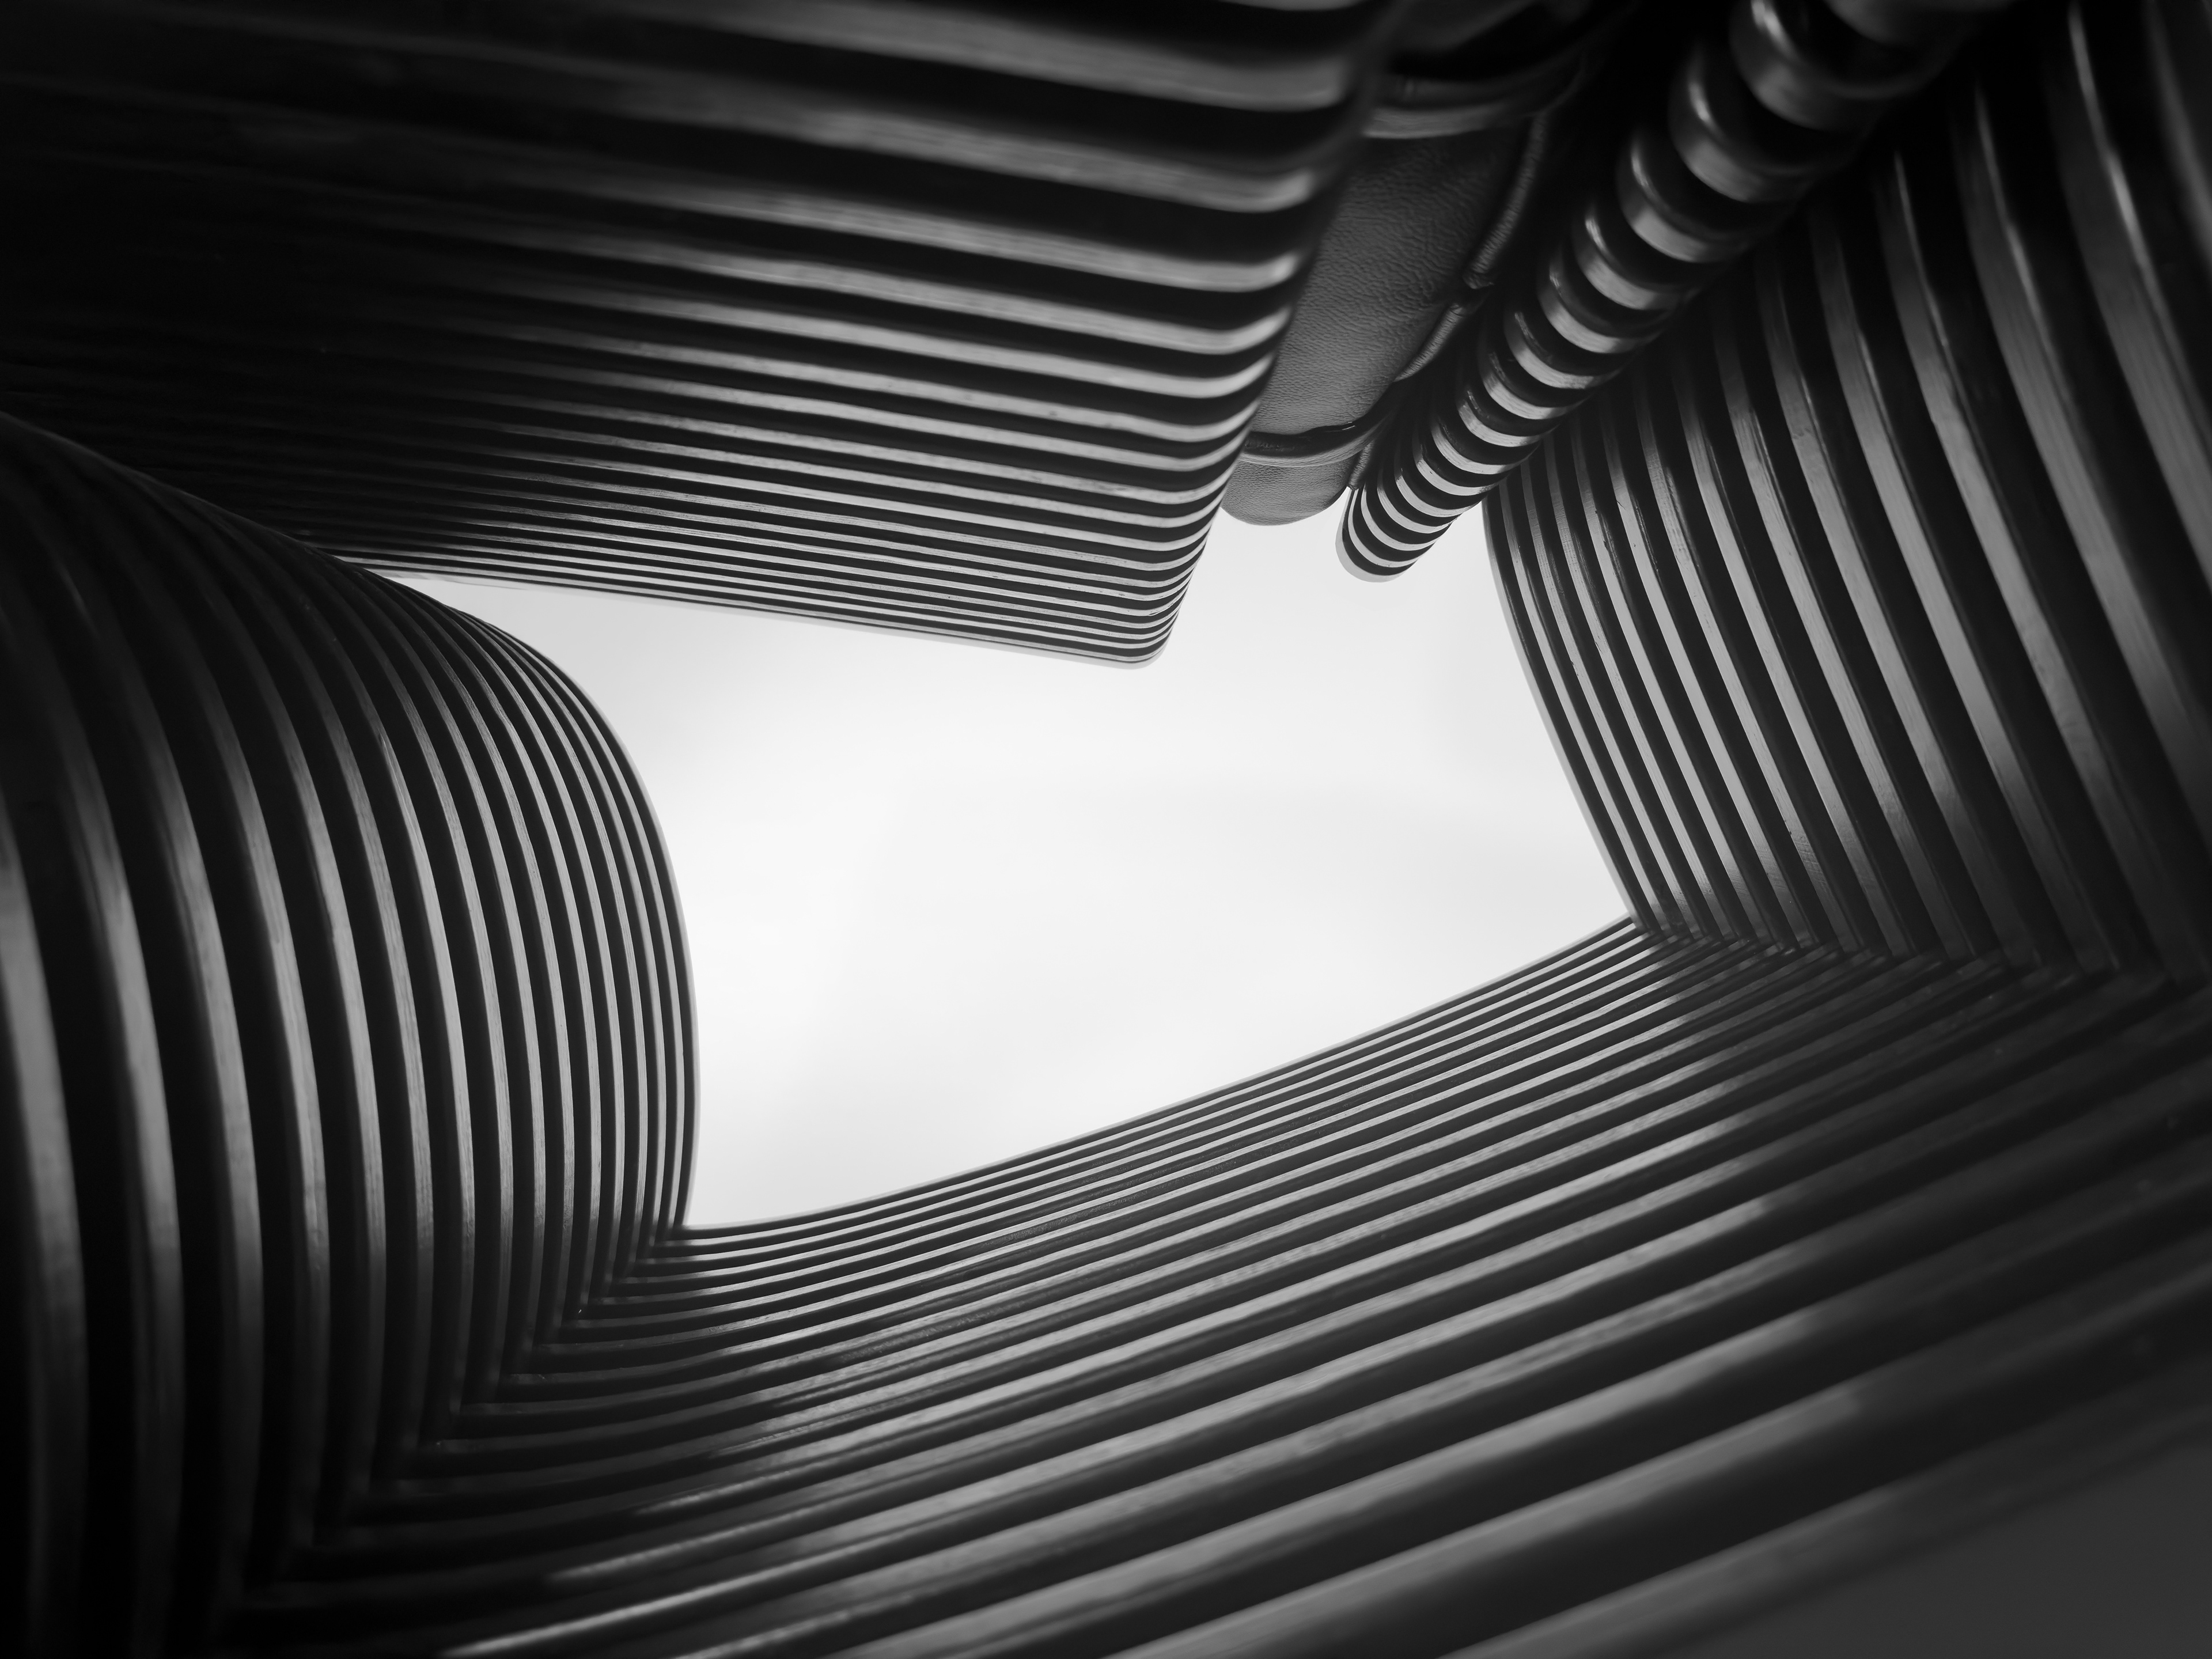
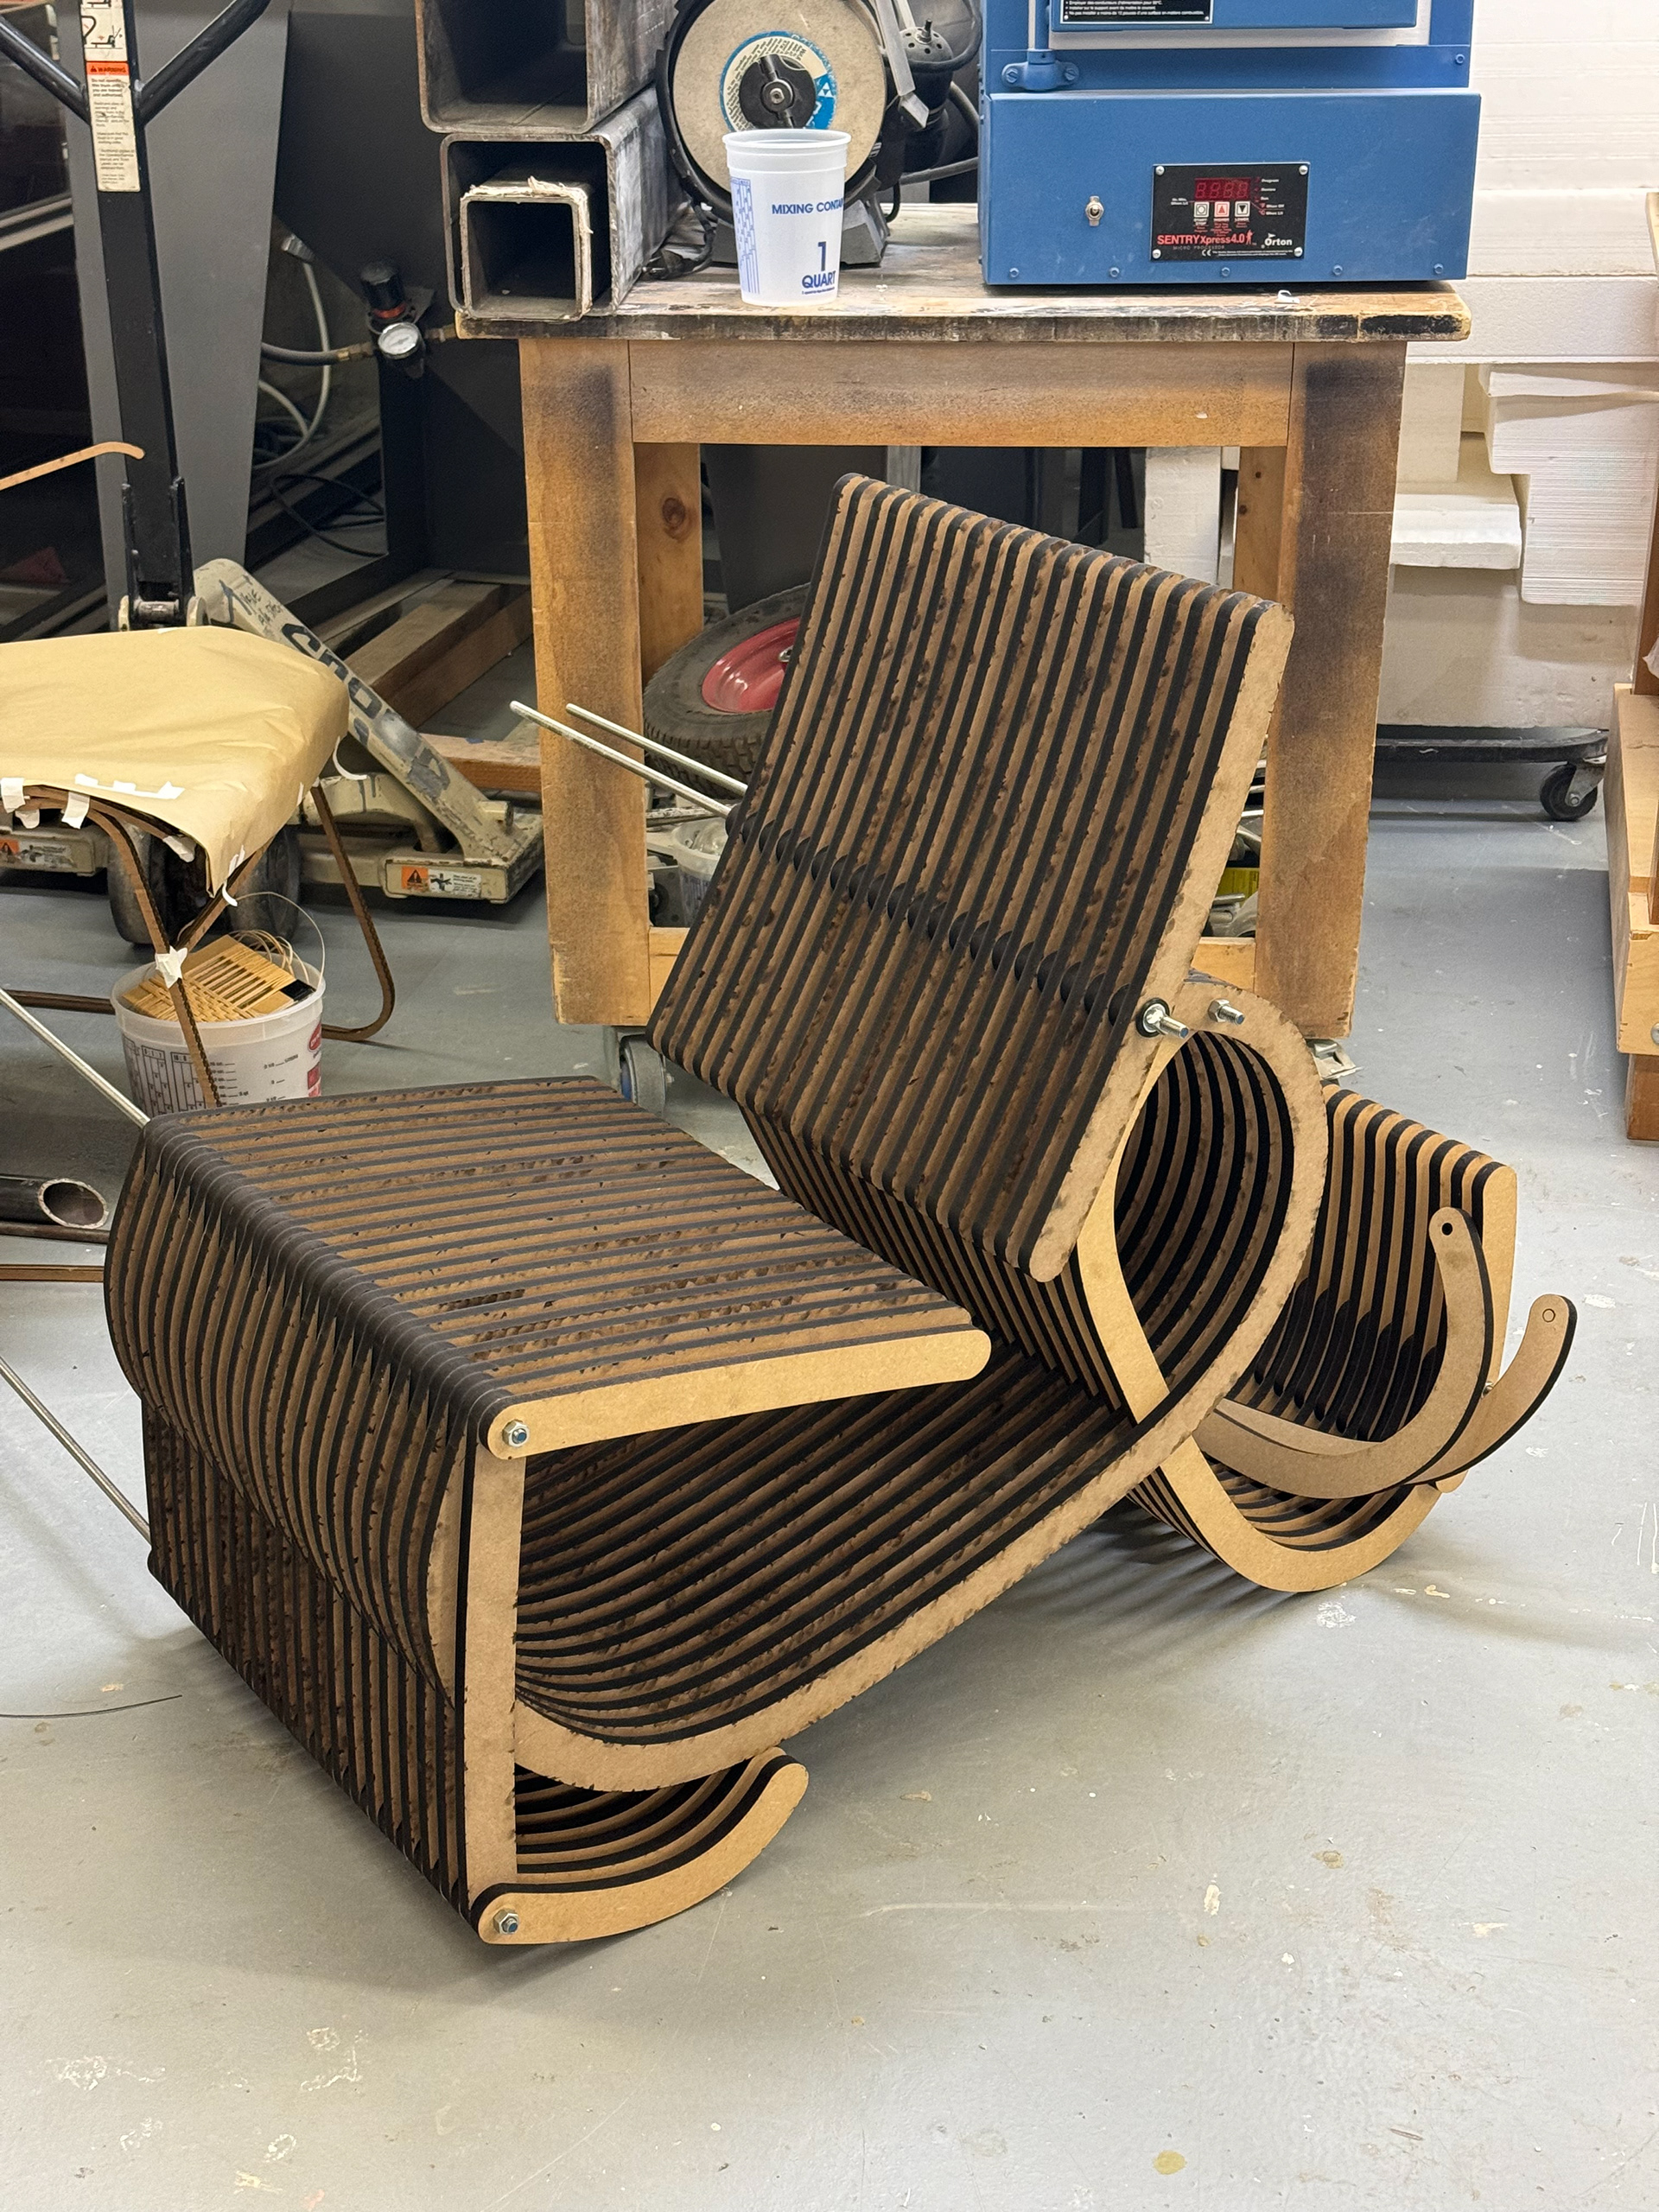
The final design iteration resolved these issues. The key realization was that, instead of relying on an external ratchet to tighten the elements through friction, the locking mechanism could be integrated into the chair — directly resisting the forces exerted by the legrest and headrest under load, and allowing each element to lock securely while remaining adjustable for transformation.
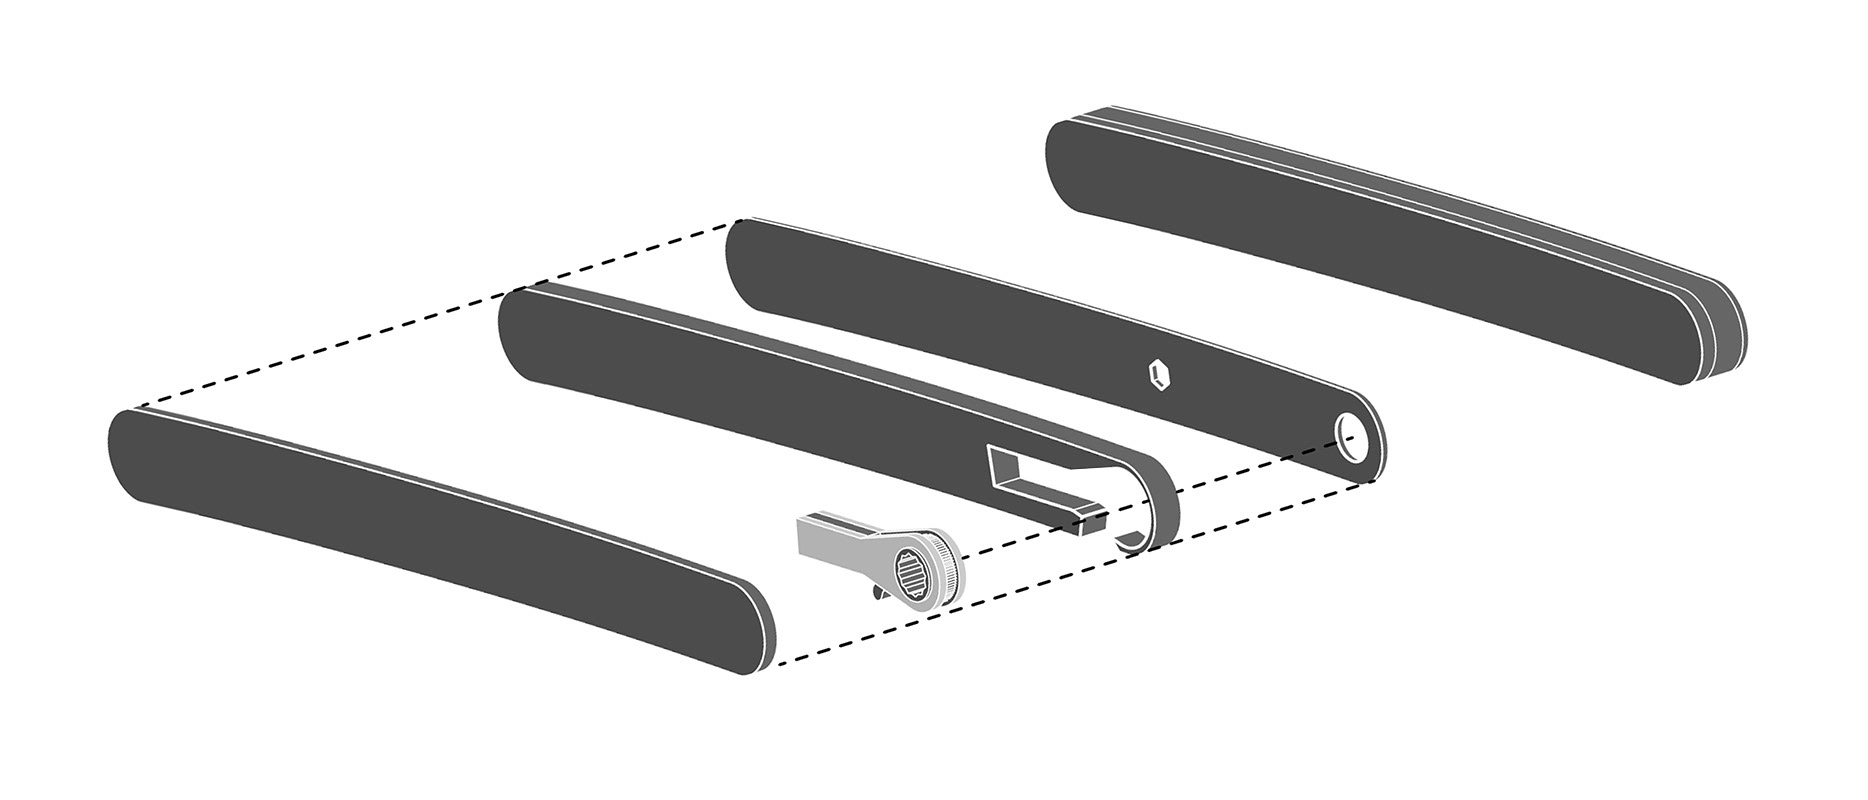
It was now time to translate months of development into a physical, working object:
Prototype 3.0
Like the previous full-scale prototypes, I began by laser-cutting every wood profile and spacer on the industrial laser cutter — nearly 250 pieces in total.
0:00 - Cutting out the wood profiles on the Kern industrial laser cutter
0:06 - Cutting out the wood spacers
0:14 - The result
Next, I sanded each profile edge to remove the burn marks, using a combination of wheel, belt, spindle, and manual sanding. Each piece went through this process twice, then was hand-finished to eliminate any remaining imperfections.
Once smooth, I rounded every edge with a handheld router fitted with a 1/16" bit and sanded them again to ensure no edge could catch on clothing or fabric.
0:00 - Sanding the blackened edges of the base
0:12 - More sanding...
0:20 - More sanding...
0:34 - Using a handheld router to round the sharp edges
0:42 - More routing...
0:48 - More sanding... by hand...
1:08 - The result
.
The next phase was metalworking — fabricating all of the concealed metal components. In total, the chair contains more than 500 metal parts, including 65 custom pieces embedded within the structure.
Every connection was engineered to eliminate wood-on-wood contact — with all joints mediated by metal components such as washers — ensuring durability and longevity, and allowing the chair to be fully disassembled, reassembled, and maintained without degradation.
The custom components were cut using the school's industrial metal laser cutter. Each piece was then sanded, fitted, and fixed into the wood profiles.
The ratchets were also cut and integrated, the steel rods measured and threaded by hand, and key components welded together to complete the assembly.
0:00 - Using the Kern metal laser cutter
0:28 - Sanding the dust off the cut steel pieces
0:45 - Smooth, sanded steel pieces
0:56 - Sawing a ratchet wrench in half
1:04 - Embedding the ratchet wrench into a wood profile
1:11 - Embedding cut steel pieces into a wood profile
1:17 - Cutting a steel connecting rod
1:25 - Tapering the rod edge and manually threading it
1:40 - Welding an elongated hex nut onto the threaded rod
Finally, it was time to assemble all the pieces and test the prototype before staining.
0:00 - Assembling the main body
0:12 - With a little help from my friends
0:18 - Attaching the metal-embedded headrest end profile
0:22 - Screwing on the hex nuts and attaching the ratchet-embedded profiles
0:36 - Testing out the headrest suspension mechanism
0:47 - The result
The school wasn't equipped to handle hundreds of components hanging to dry in the middle of finals season, so I brought the chair home for staining — turning my dining room into a makeshift quarantine zone for the next few weeks.
The process involved three coats of black stain followed by two clear coats, applied over dozens of hours with light sanding between each layer and several days of drying cycles.
0:00 - Rolling the chair home
0:17 - Setting up the quarantine zone
0:26 - Disassembling the chair
0:37 - Hanging all of the wood profiles
0:44 - Putting on a hazmat suit and beginning to stain
1:25 - Staining clear coat
1:48 - Assembling the chair
2:01 - Lightly sanding blemishes and vacuuming the dust
2:10 - Final clear coat
2:24 - Using removable hide glue to lock the metal-on-metal connections
.
After two long weeks, every piece was finally cured, and the chair was ready to be reassembled — and completed at last.
Behind the Scenes: Photoshoots
Connect After ICFF
Thank you!
Intellectual Property Notice: This design and its associated mechanical and structural features are protected by issued and pending intellectual property rights.
United Kingdom design registrations: 6450716, 6450717, 6450718 | European Union Community design registrations: 015106528-0001, 015106528-0002, 015106528-0003 | Canada industrial design application: 241084 | United States design patent application: 29/979,089 | United States utility patent application: 19/419,859
All rights reserved. No part of the protected subject matter may be reproduced, manufactured, distributed, or commercially exploited without prior written authorization.